All CIMPLICITY action types (found in the Event Editor) are available except for:
![]() Alarm Lookup and
Alarm Lookup and
![]() Recipe Upload/Download.
Recipe Upload/Download.
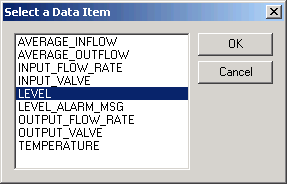
The difference between configuring a class action and a standard action is that you:
![]() Select a data item
instead of a point ID when you configure an action that requires a
point ID.
Select a data item
instead of a point ID when you configure an action that requires a
point ID.
![]() The CIMPLICITY
$OBJECT variable is automatically
entered when you select the data item.
The CIMPLICITY
$OBJECT variable is automatically
entered when you select the data item.
![]() Note: The user can associate a
non-object event with an object action. This allows an object to
instantiate actions that can be called from other events.
Note: The user can associate a
non-object event with an object action. This allows an object to
instantiate actions that can be called from other events.
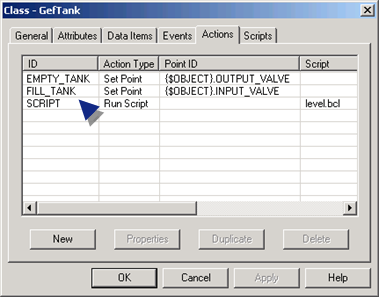
Fill in the fields as follows.
![]()
|
Action type |
||
|
Actions available in the drop down list for classes include:
|
||
|
Field |
Button |
Opens |
|
Fields vary based on your selected action. One or more of the following fields may display. The value can be selected from the associated browser |
||
|
Point ID Source Alarm ID
|
|
Note: The CIMPLICITY $OBJECT variable appears in the Point ID field before the data item as follows: {$OBJECT).DataItem |
|
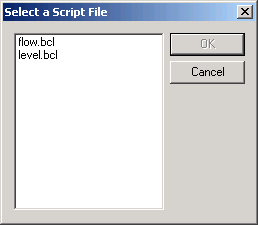
Script |
|
|
|
Resource |
|
CIMPLICITY Select a Resource browser |
Click OK.
Result: The action, which is modified or created, displays on the Actions tab in the Class dialog box.
Supported String Substitution for Action Fields
String substitution is supported for the following action fields, which you enter in the associated Action dialog box field.
![]() Point ID.
Point ID.
![]() Resource ID.
Resource ID.
![]() Point value.
Point value.
|
|
Step 6. Configure class actions. |