|
CimEdit screens configuration overview. |
|
|
CimEdit screens configuration steps. |
CimEdit screens configuration overview
In addition to creating the components that will enable an object designer to quickly create an object from a class (e.g. points, events, actions and scripts) you can create a class CimEdit screen which, when used for an object, will provide an operator with the necessary visual interface.
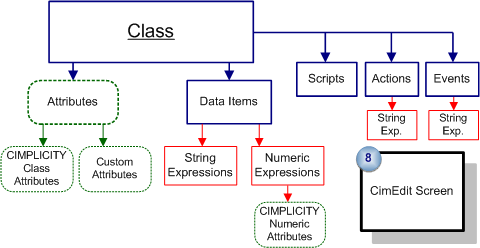
When you configure a class CimEdit screen an object designer can drag an existing object from the Workbench to a new CimEdit screen.
The source object from the class CimEdit screen appears on the new screen. Object values are substituted for variables, e.g. $OBJECT, that were configured on the source screen.
![]() Tip: It is recommended that you
configure the following in the order they are listed:
Tip: It is recommended that you
configure the following in the order they are listed:
Other class components.
One object that you can use to test the screen you are creating.
The class CimEdit screen.
![]() Important: This step provides an overview of how
to configure a CimEdit screen for a class. It assumes that you are
familiar with CimEdit configuration, which is essential for
creating an effective class CimEdit screen.
Important: This step provides an overview of how
to configure a CimEdit screen for a class. It assumes that you are
familiar with CimEdit configuration, which is essential for
creating an effective class CimEdit screen.
CimEdit screens configuration steps
|
Place the required objects on the screen. |
|
|
Group the objects into a top-level group. |
|
|
Enter class specifications for the top-level group. |
|
|
Apply class attributes (variables) to CimEdit objects within the top-level group. |
|
|
Associate the CimEdit screen with its class. |
|
|
Class configuration steps. |