The Microsoft Cluster Administrator provides a Wizard to create a resource. The Cluster Administrator also includes Microsoft documentation describing how to create resources.
However, there are some special considerations for configuring a CIMPLICITY resource.
![]() Note: Your configuration can be modified after
the resource is created through the CIMPLICITY Project Resource
dialog box.
Note: Your configuration can be modified after
the resource is created through the CIMPLICITY Project Resource
dialog box.
CIMPLICITY configuration in each of the Wizard dialog boxes is as follows.
|
|
Open the Resource Wizard. |
|
|
Define a new CIMPLICITY resource. |
|
|
Select possible CIMPLICITY project owners. |
|
|
Select CIMPLICITY project dependencies. |
|
|
Select the CIMPLICITY project for the resource. |
|
|
Finish creating the resource. |
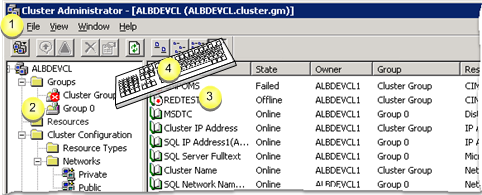
Open the Resource Wizard
Do any of the following.
|
1 |
Click File>New>Resource on the Cluster Administrator menu bar. |
|
2 |
|
|
3 |
|
|
4 |
|
Result: The New Resource dialog box opens.
Define a new CIMPLICITY resource.
Configuration for the CIMPLICITY project resource is as follows.

|
Field |
Description |
|
|
Name |
Any name is acceptable for the resource. |
|
|
Description |
(Optional) A description can help identify the resource. |
|
|
Resource type |
(Required) Select CIMPLICITY Project. |
|
|
Group |
The selected group displays. Any other group can be selected. |
|
|
Run this resource in a separate Resource Monitor |
(Strongly recommended) Check this option. |
|
Click .
Result: A Possible Owners dialog box opens.
Select possible CIMPLICITY project owners.
Add the nodes that have access to the CIMPLICITY project's shared drive to the Possible owners box.
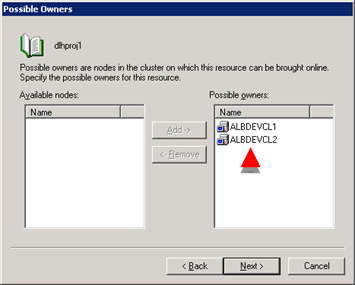
Click .
Result: A Dependencies dialog box opens.
Select CIMPLICITY project dependencies.
Note: The options available for dependencies depend on what group or resource you selected before you open the wizard.
![]() (Required) Add the shared drive with the project
that will be selected for the resource.
(Required) Add the shared drive with the project
that will be selected for the resource.
![]() (Optional) Add the cluster name.
(Optional) Add the cluster name.
Note: If you add the cluster name and want to move the resource, you can keep the same IP address.
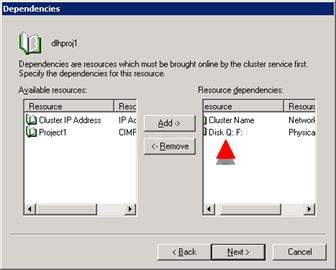
Click .
Result: The CIMPLICITY Project Parameters dialog box opens.
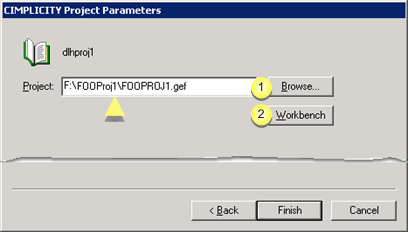
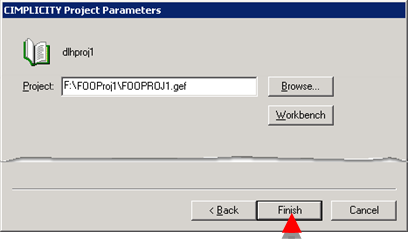
Select the CIMPLICITY project for the resource.
Enter the project path and name in the Project field.
Important: The project must be on the shared drive that was selected as a resource dependency.
|
Browse |
|
|
Workbench |
|
Browse |
Click
An Open Browser opens.
Select the connected drive (that was selected as a resource dependency).
Important: You can access the drive only if you are working on the node that is controlling the resource.
Select the project that should be used for the resource.
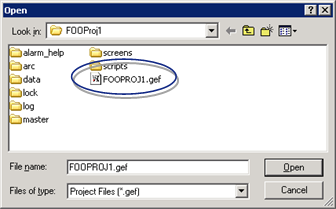
Result: The project and path display in the Project field. The project is used for the resource.
|
Workbench |
Click to open the selected project's Workbench.
Important: You can open the Workbench only if you are working on the node that is controlling the resource.
Work in the Workbench as follows.
Workbench off line
Stop the project the same way you do when it is not in a cluster.
The project is taken off line.
Configure the project while it is stopped (off line).
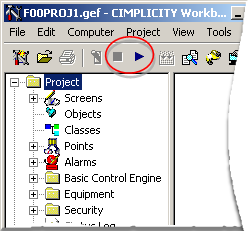
Note: The Workbench remains open after the Properties dialog box is closed; you can continue configuration.
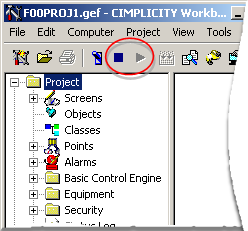
Workbench online
Start the project the same way you do when it is not in a cluster.
Finish creating the resource.
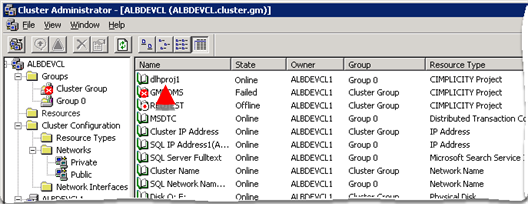
Click on the CIMPLICITY Project Parameters dialog box.
The resource is added to the Cluster Administrator resource list.
Right-click the resource.
A Popup menu opens.
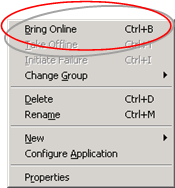
Select Bring Online.
Result: The resource is listed in the Cluster Administrator as online.
|
|
About CIMPLICITY cluster. |