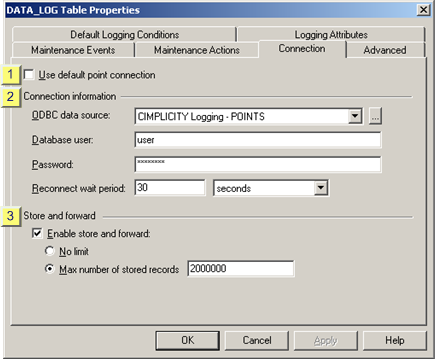
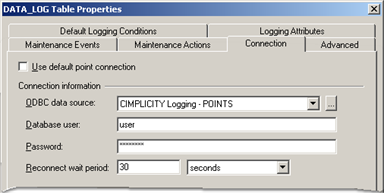
Select the Connection tab.
Configuration is as follows.
|
Use default point connection |
Clear Use default point connection.
The Connection tab is enabled to enter specifications for the selected table.
|
Connection information |
The connection information enables you to select an ODBC data source that is different from the default.
|
Connection options |
|
|
ODBC data source selection procedures. |
Connection Options
|
Field |
Description |
||
|
ODBC data source |
An ODBC data source can be: |
||
|
|
A |
Selected from the field's drop-down list |
|
|
|
B |
A re-configured existing source or a new ODBC data source. |
|
|
Database user |
User who will connect to the selected database driver. Important: This field is required if you are connecting to a SQL Server. |
||
|
Needed to connect to the selected database driver. Important: This field is required if you are connecting to a SQL Server |
|||
|
Reconnect wait period |
A value between 0 (continuous retries) and 24 hours. This value specifies the amount of time that the Database Logger waits between reconnect attempts when the connection to the database is lost. Time unites include:
|
||
|
|
Default |
30 seconds. |
|
ODBC data source selection procedures
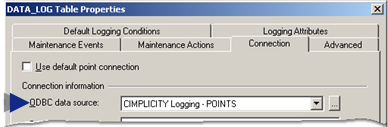
Select an ODBC data source from the drop down list in the ODBC data source, field. You can select from available options or configure an existing or a new ODBC data source:
Basic options include, but are not limited to:
|
Selection |
SQL Server is: |
Logs to: |
|
CIMPLICITY Logging - Alarms |
Installed |
SQL Server database |
|
|
Not installed |
cimplog.mdb in the ...\Proficy CIMPLICITY\ARC directory |
|
CIMPLICITY Logging - Points |
Installed |
SQL Server database |
|
|
Not installed |
pointlog.mdb in the ...\Proficy CIMPLICITY\ARC directory |
Note: If you have an Oracle database, you may see the ODBC data source that you created for Oracle.
Configure an existing or add a new ODBC data source.
Click the button ![]() to the right of the ODBC data source field.
to the right of the ODBC data source field.
The ODBC Data Source Administrator opens.
Select the System DSN tab.
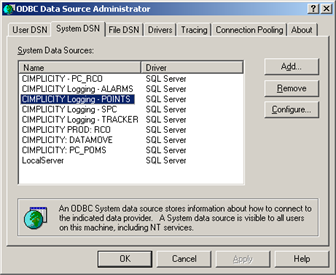
Configure the new ODBC data source based on the data source procedures.
Close the ODBC Data Source Administrator.
Select the new ODBC data source from the drop down menu.
|
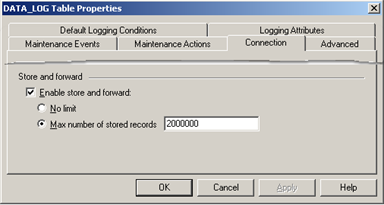
Store and forward |
When Enable store and forward is checked the DATA_LOG will perform store and forward functions.
Options are:
|
Option |
Description |
|
|
Checked enables No Limit. The Database Logger will store an unlimited number of records when its connection to the database is down. The number of records actually stored is determined by the amount of time the connection is lost and by the amount of free disk space you have. |
||
|
Max number of stored records |
The Database Logger will store a specified number of records when its connection to the database is down. Enter a number between 1 and 4294967285. |
|
|
|
Checked |
Enables Max number of stored records. |
|
|
Field |
Number that will be the maximum stored. Valid numbers are from 1 to 4294967285. |
|
|
Step 2.6. Configure the logging connection. |