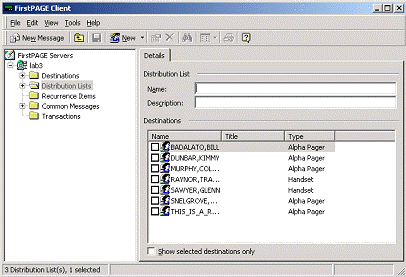
Select the Distribution Lists folder from the tree view then click the button on the toolbar.
The FirstPAGE Distribution Lists screen displays.

(Optional) Enter the name of the Distribution List in the Name field.
Check the Destinations that will be members of this Distribution List.
Note: You can currently only add personal destinations to your distribution list. Public distribution list members may only be viewed and cannot be added to your personal distribution list.
Check Show selected destinations only to display only those destinations that are a member of the distribution list, rather than the full list of destinations.
Click the button on the toolbar to save changes.
Standard Client allows you to send a message to an individual member of a distribution list. This is helpful if you want to send a message to someone you know works in Body for example, but are not sure of the full name.
Simply select the distribution list, then from the Details tab select the destination and right-click to send a New Message to this destination.
Note: You can will not be able to edit any public distribution lists that have been created in FirstPAGE Administrator.
![]() Creating a distribution list in
standard or classic mode.
Creating a distribution list in
standard or classic mode.