Select the Destination folder or select a specific destination from the tree view then click on the toolbar.
A message screen opens.
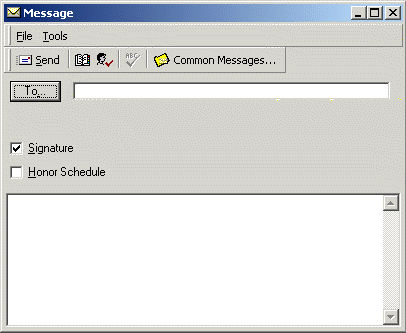
Note: This is FirstPAGE Client Standard Mode
Enter the name of the destination you wish to page or click the button to provide a list of destinations available for messaging.
Note: You may enter in a destination’s Alias name that has been assigned in FirstPAGE Administrator. e.g. enter alias Bob to page Robert Plant.
Click the Honour Schedules check box through the Tools menu to send the message to the users who are currently available.
The Honour Schedules function allows you to limit pages only to those users who are currently working.
Click the Signature check box to include a signature with your message.
Click the Check Recipient Names icon in the toolbar to verify destination names. If keying the destination name, be sure to use the full name or enter in the Alias for the destination, if one has been created in the Pager Administrator.
Tip: A spell checking feature is also available in the Tools menu to verify the text used in the message text field.
Add a message.
Tip: Select from a list of previously entered messages by clicking the button in the toolbar then selecting one of the available messages.
Click or press Enter, once the message is complete, to send the page to the user.
Note: Some service providers have upper limits on the amount of data per page. If your message is longer than is supported by the service provider, FirstPAGE will automatically break the message up into multiple pages.
If the user you have chosen has a numeric pager, you will be limited to typing numeric characters (i.e. 0,1,2...9). You cannot send an empty message, nor can you send textual messages to distribution lists or groups containing users with numeric destinations.
![]() Using Common Messages
Using Common Messages
![]() Sending a page in standard and classic
mode.
Sending a page in standard and classic
mode.