Click Log on the status log viewer menu bar.
Select Print...
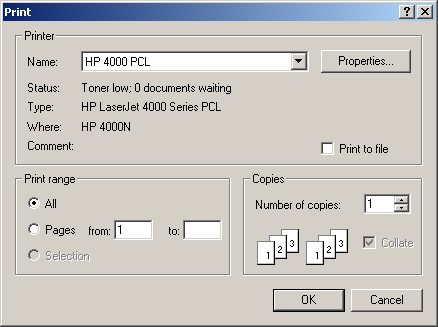
The Print dialog box opens.

The options are as follows.
|
Option |
Description |
|
Name |
Displays the name of the currently selected printer. You can click the drop-down list button to the right of the input field and select from the list of available printers. |
|
Print Range |
Select All to print all Status Log messages, or select Pages and enter a page range to print selected pages. Note: If you applied a Filter to the Status Log display, only the displayed messages will print. |
|
Copies |
Enter the number of copies you want printed in this input field. |
|
Print to file |
Set this check box if you want to save the printout in a file in addition to printing. |
|
Properties |
Opens dialog box to display and change your printer properties. |
|
OK |
Prints the log. |
|
Cancel |
Cancels print |
![]() Notes:
Notes:
![]() The header line on each page of
the printout shows the computer name, the full path name for the
Status Log file and a page number.
The header line on each page of
the printout shows the computer name, the full path name for the
Status Log file and a page number.
![]() You can select the default Status
Log printer by selecting Log>Print Setup... from the Log File
Viewer menu bar.
You can select the default Status
Log printer by selecting Log>Print Setup... from the Log File
Viewer menu bar.
|
Step 3. Work in the status log viewer. |