The first step in using server redundancy is to configure your project to be redundant.
You use the Project Properties dialog box to tell the primary server where to send files and screens and collect data (after a failure) from the secondary server.
Select Project on the Workbench menu bar.
Select Settings.
The Project Properties dialog box appears.
Select the General tab.
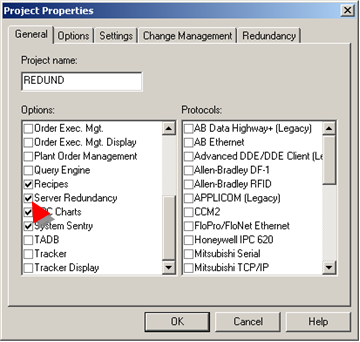
Check Server Redundancy in the Options box.
Select the Redundancy tab.
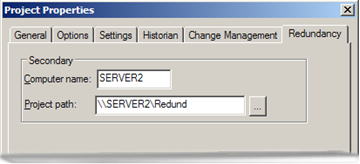
Enter the following information in the Redundancy tab:
|
Computer name |
Enter the name of the secondary Server. |
|
Project path |
Enter the directory on the secondary Server where the CIMPLICITY project will be stored.
|
Configuration files and screens are copied from the primary server to the Project path whenever a Configuration Update is performed.
![]() Important: Make sure
you configure the logging setup on both the primary and secondary
server through the Database Logger in the CIMPLICITY Workbench.
Important: Make sure
you configure the logging setup on both the primary and secondary
server through the Database Logger in the CIMPLICITY Workbench.
|
|
Base system configuration. |