Following are the procedures to setup Server redundancy and starting/stopping of remote projects on Vista and Windows Server 2008:
![]() Important: You must be a user in the
administrators group to set up server redundancy on a remote
machine that is part of a Workgroup.
Important: You must be a user in the
administrators group to set up server redundancy on a remote
machine that is part of a Workgroup.
|
|
Server Redundancy Setup |
|
|
|
On the primary and secondary servers |
|
|
|
On the secondary server |
|
|
|
On the primary server |
|
|
Remote project start from the Workbench |
||
Server Redundancy Setup
On the Primary and Secondary Servers
Do the following on both the Primary and Secondary servers
Follow the CIMPLICITY documentation requirements for Server Redundancy to set up the hardware and network, including
![]() Hardware.
Hardware.
![]() Computer.
Computer.
![]() Network.
Network.
Create the same user on both servers.
The user must:
![]() Be in the Administrator group
Be in the Administrator group
![]() Have the same user name on both servers.
Have the same user name on both servers.
![]() Have the same password on both servers.
Have the same password on both servers.
Configure the machines to be in the same workgroup.
Do the following in the Windows Firewall.
Select Start>Control Panel>Windows Firewall.
Select the Exceptions tab.
Check the following.
![]() File and Printer Sharing
File and Printer Sharing
![]() Netlogon Service
Netlogon Service
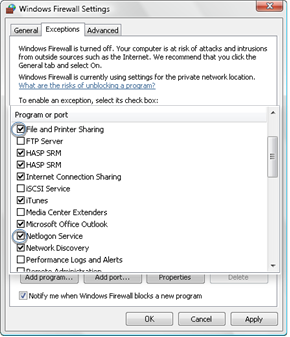
Click .
Configure the network(s) between the computers as Private.
On the Secondary Server
![]() Note: If you want to start
the project on the primary server from the secondary server, you
also have to do these procedures on the primary server,
Note: If you want to start
the project on the primary server from the secondary server, you
also have to do these procedures on the primary server,
Open the Control Panel>Network and Sharing Center.
Make sure the following are enabled.
![]() File sharing
File sharing
![]() Password protected sharing
Password protected sharing
Edit the Registry to access a remote WinRM service in a workgroup, as follows.
Note: If the account is a local computer member of the Administrators group, the User Account Control (UAC) does not allow access to the WinRM service.
![]() Warning: Making changes to the registry is very
dangerous and should be done with care.
Warning: Making changes to the registry is very
dangerous and should be done with care.
Run regedit.exe or regedt32.exe.
Expand the following folders in the Registry Editor left-pane.
HKEY_LOCAL_MACHINE
SOFTWARE
Microsoft
Windows
CurrentVersion
Policies
System
Right-click System in the left pane; select New DWORD (32-bit) Value on the Popup menu.
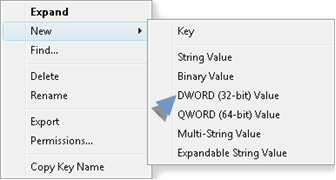
Enter LocalAccountTokenFilterPolicy in the new field that displays in the Registry Editor right-pane.
Press Enter.
Double click LocalAccountTokenFilterPolicy
Enter 1in the Value Data field.
Click .
Close the Registry Editor.
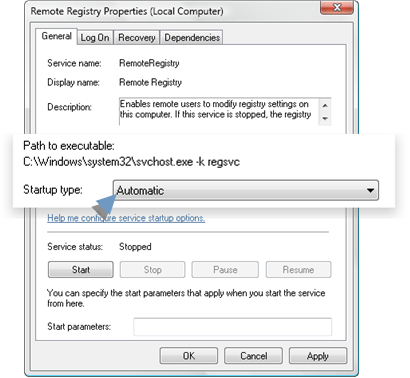
Set Remote Registry startup to Automatic, as follows.
Open the Control Panel>Administrative Tools>Services.
Right-click Remote Registry; select Properties.
Select Automatic in the Startup type list field.
On the Primary Server
Configure project with server redundancy and use a UNC path name for the Project path under the Redundancy tab on the Project Properties.
Remote Project Start from the Workbench
The following procedure enables selected users to start a remote project from the Workbench.
On the Computer that will start a project on a remote computer.
Map a drive from remote computer to the local computer to access the project.
Grant full access for each administrative user who will perform administrative tasks, including configuration update, dynamic configuration, as follows.
Open a command window.
Enter the following.
net share /grant:Username1,FULL [/Grant:Username2>,FULL] [/Grant:UsernameN>,FULL]
Where
|
Sharename=drive:path |
Drive and path of the share |
|
Username |
You can enter as few as one name to as many names as should have this privilege.
|
|
FULL |
Grants full access. |
Continue setup using the same procedures that you use to set up server redundancy.
|
|
Server redundancy configuration procedures. |