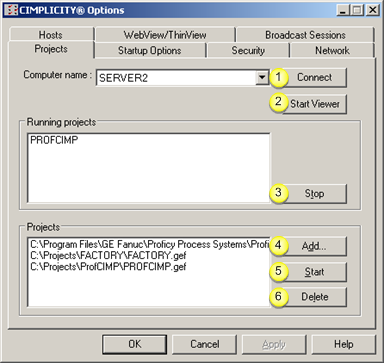
Select the Projects tab in the CIMPLICITY® Options dialog box.
Options are as follows.
|
Connect to another Computer as a Server. |
Select a computer in the Computer name drop-down list to which your computer has access and is currently running CIMPLICITY software.
![]() Note: If the computer name does not appear in
the list, type it in the Computer Name
field and click .
Note: If the computer name does not appear in
the list, type it in the Computer Name
field and click .
Result: The projects that are currently running on the selected computer display in the Running Projects field.
|
Connect to CIMPLICITY Projects as a Viewer. |
Select the Projects tab in the CIMPLICITY Options dialog box.
The tab displays the local computer in the Computer name field.
![]()
Click .
The router starts and VIEWER appears in the Running projects box.
The Computer name field now has computer names to which the local computer has Viewer access.
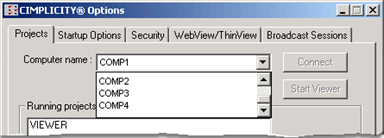
Select another computer from the new Computer name drop down menu.
Note: If you type in the computer name click to connect to the computer.
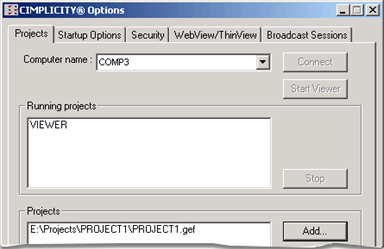
Result: Projects that are running on the selected computer appear in the Running projects box. You can now view them through CimView.
|
Stop a running project. |
You may stop any project that is currently running on the computer to which you are currently connected as a server.
Select the project in the Running projects list.
Click .
If you are connected as a server, a confirmation message opens.
Click to confirm that you want to proceed with the shutdown.
Result: After the project is stopped, CIMPLICITY removes the name from the Running projects list.
|
Add a Project to the Projects List. |
Click .
The Open dialog box opens.
Use the Open dialog box to search for the project (.gef) file you want.
Click .
Result: The project you select is added to the Projects list.
|
Start a Project in the Projects List. |
Select the project.
Click .
Verify that you want to start the project.
Result: The project you select is started. When startup is complete, CIMPLICITY adds the project name to the Running projects list.
|
Delete a project from the Projects List. |
You can delete any project from the list and disconnect it from your computer.
Select the project in the Projects list.
Click .
A confirmation message opens.
Click to confirm that you want to proceed with the deletion.
Result: After the project is deleted from the list, CIMPLICITY removes the name from the Projects list.
|
|
About CIMPLICITY options. |