Use any of the following methods to begin ThinView.
Method 1
Click the ThinView icon on the Windows CE device desktop.
Method 2
Click Start on the Windows CE taskbar.
Select Programs.
Select CIMPLICITY ThinView.
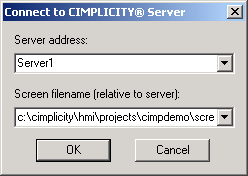
Method 1 or Method 2 opens a Connect to CIMPLICITY Server dialog box. If the entries are correct, go to 4 in this procedure. Otherwise, go to 2.
Method 3
Method 3 immediately connects you to a specified screen on the CIMPLICITY server. A system administrator might configure the icon before giving the Windows CE device to a user.
Click a pre-configured ThinView shortcut on the Windows CE desktop.
Go directly to 4 in this procedure. ThinView will proceed as described there.
Enter the server name or IP address in the Server address field.
The name (e.g. Server1) is the server's computer name in the network.
The IP address (e.g. 3.29.5.222) is controlled by your network's administrative process.
|
Technique for determining IP Address. |
Note: The server's TCP Port is usually the default, 10212. Therefore, ThinView assumes it is 10212. However, if your server's TCP Port is different, you need to add a colon and the port number to the server name or IP address.
Example
Roclemn2.domain.co.com: 10213
Enter a path and screen file name that you want to use as the initial screen in the Screen filename field.
The path is the path you would enter if you were working directly on the server.
Example
C:\Program Files\GE Fanuc\CIMPLICITY\Projects\cimpdemo\screens\turbine.cim
is the actual path on the server. It takes its direction from the server, not the Windows CE device.
(For users who have opened the Connect to CIMPLICITY Server dialog box) Click OK.
A message informs you of the connection status between the Windows CE device and the server.
When the ThinView server connects a CIMPLICITY Login dialog box may appear in front of an inactive CimView screen.
Enter your User ID and Password.
Click OK.
Result: The Login dialog box disappears and the initial CimView screen actively displays the configured data.
|
|
Basic steps for ThinView on a Windows CE device. |