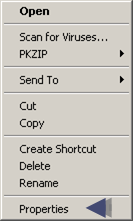
Right-click the PRT User Interface shortcut on the Windows desktop.
A Popup menu opens.

Select Properties.
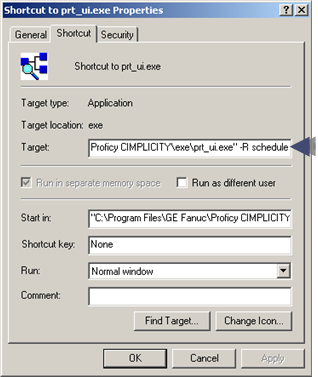
The PRT User Interface Properties dialog box displays.
Enter the switch and parameter to customize the PRT User Interface when opened In the Target field. Use the following switch options:

|
Switch |
Parameter |
|
-R <region name> |
<region name>is a valid region name. Displays information for a specific region. |
|
-S <prtsystem> |
<prtsystem> is the PRT server to connect to in the project. Enables use of a particular PRT service. If none is specified, all regions on any PRT system are displayed. |
|
-N <node/project> |
<node/project> specifies the node or project name with which to connect. Enables connection to the named node or project. If none is specified, the connection is made to the local project. |
|
/L |
Displays Region Label (drop down) browse support. Note: /l can be used in upper or lower case. |
|
/LID |
Displays both:
|
|
-P <path> |
<path> is the path name where the configuration files are loaded. This option must be used if accessing a remote project. |
|
-I <file path> |
<file path> is the name of the file used to connect to multiple projects. |
|
|
|
|
Example |
|
|
"C:\Program Files\GE Fanuc\Proficy CIMPLICITY\EXE\prt_ui.exe" -R schedule |
|
|
Where |
= |
|
"C:\Program Files\GE Fanuc\Proficy CIMPLICITY\EXE\prt_ui.exe" |
exe target location |
|
-R |
Switch for region |
|
schedule |
The PRT_UI will open in the Schedule region |
Click OK.
Result: Parameters that are indicated in the Target field will be triggered when the PRT User Interface is accessed.
![]() Note: If you are viewing the PRT User
Interface from a Viewer, you do not have to use the
Note: If you are viewing the PRT User
Interface from a Viewer, you do not have to use the
–N switch on the command line to connect to a remote project. When the prt_ui is initially launched, a dialog box will display allowing connection with a remote project that has been enabled for broadcast.
|
Step 1.5. Create a shortcut to open the PRT_UI. |