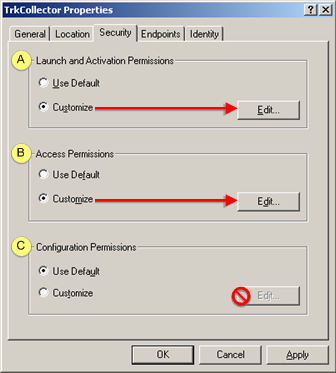
Select the Security tab in the TrkCollector Properties dialog box.
Configure permissions as follows.
|
Launch and Activation Permissions |
|
|
Access Permissions |
|
|
Configuration Permissions |
|
Launch and Activation Permissions |
Check Customize.
Click
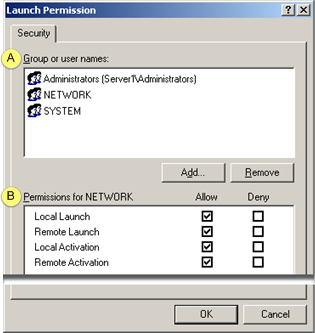
The Launch Permissions dialog box opens.
Add the following.
|
A |
If you are configuring local peer to peer/non-domain users: |
|
|
Select the correct domain that has the user account you wish to use. The {node} prefix below would become a domain prefix now.
{node}\Administrators NETWORK SYSTEM |
|
B |
Check for each of the following (for the selected group or user names).
|
Click
Result: The TrkCollector Properties dialog box displays.
|
Access Permissions |
Check Customize.
Click
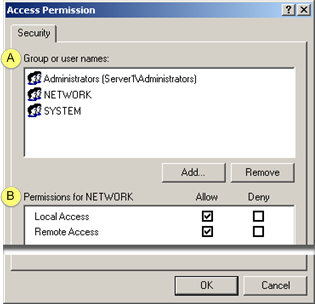
The Access Permissions dialog box opens.
Add the following.
|
A |
|
|
|
Select the local node name (referred to as {node} in the List Names From: combo box.
Select the correct domain that has the user account you wish to use. The {node} prefix below would become a domain prefix now.
{node}\Administrators NETWORK SYSTEM |
|
B |
Check for each of the following (for the selected group or user names).
|
Click .
Result: The TrkCollector Properties dialog box displays.
|
Configuration permissions |
Retain default configuration permissions for TrkCollector.
Result: The TrkCollector part of the configuration is complete.
|
|
Step 6.2. configure TrkCollector. |