|
User configuration steps |
|
|
Review existing users |
User configuration steps
When you enter specifications for a user you
|
Open a User Properties dialog box. |
|
|
Configure user general (security) properties. |
|
|
Configure user resource availability. |
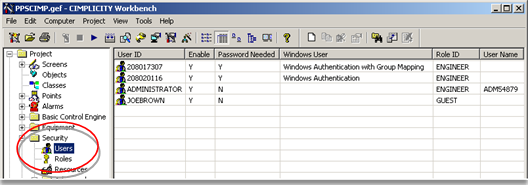
Review existing users
Expand the Security folder in the left pane of the Workbench.
Click Users.
The Workbench right pane can display the following attributes for each User.
|
User ID |
A name that uniquely identifies each user. |
|
Enable |
Indicates if the account is enabled or disabled. |
|
Password Needed |
If a password is needed for the selected user. |
|
Windows User |
Identifies users who are authorized by Windows authentication. |
|
Role ID |
The role assigned to the user. This determines the privileges assigned to the user. |
|
User Name |
The user's name. |
![]() Note: Use the
Workbench Field Chooser to remove or re-display any of the fields,
except the User ID. The User ID is required.
Note: Use the
Workbench Field Chooser to remove or re-display any of the fields,
except the User ID. The User ID is required.
The User list is initially sorted by User ID. You can click any of the other column titles at the top of the list to sort the list by that attribute.
|
|
About users. |