You use the Swap Color dialog box to swap the colors of an object (or group of objects, or a bitmap) to new colors.
Note: You may find that you get unexpected results when swapping colors in your bitmaps if they contain areas that have either very high or very low luminance values (that is, white or black areas). This is due to the fact that these areas contain almost no color, only luminance. For example, areas that represent specular highlights (the shine on a brightly illuminated steel conveyor belt, for example) will remain colorless no matter how the color for the rest of the bitmap is adjusted. Consequently, before working with the Swap Color dialog box and other color tools, familiarize yourself with the concepts of hue, luminance, and saturation in order to avoid unexpected results with the images on your graphics pages.
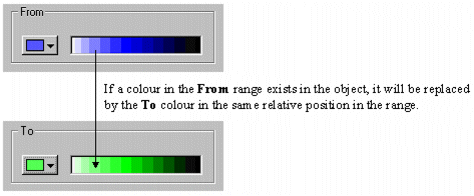
From
The current color of the object. If you click the Swap range check box, it presents a range of colors in varying degrees of brightness ranging from white to black. Any colors in this range that exist in the object are replaced by the corresponding colors from the To range as follows:
To
The color the original object color will be changed to. If you click the Swaprange check box, it presents a range of colors in varying degrees of brightness from white to black. This allows you to swap a whole range of colors at once.
From any color
Specifies to change every color in the object to the new color.
Swap range
Specifies to swap a range of colors. The From and To boxes indicate the starting colors in the ranges.
Note: You cannot invert colors with Swap Range selected. This means, for example, that you could not swap dark red for light green and light red for dark green in one go.