Configuration computer specific Server |
|
Monitor administration -> Configuration of the classical monitor administration -> Configuration computer specific Server |
|
|
Configuration computer specific Server |
|
Monitor administration -> Configuration of the classical monitor administration -> Configuration computer specific Server |
|
|
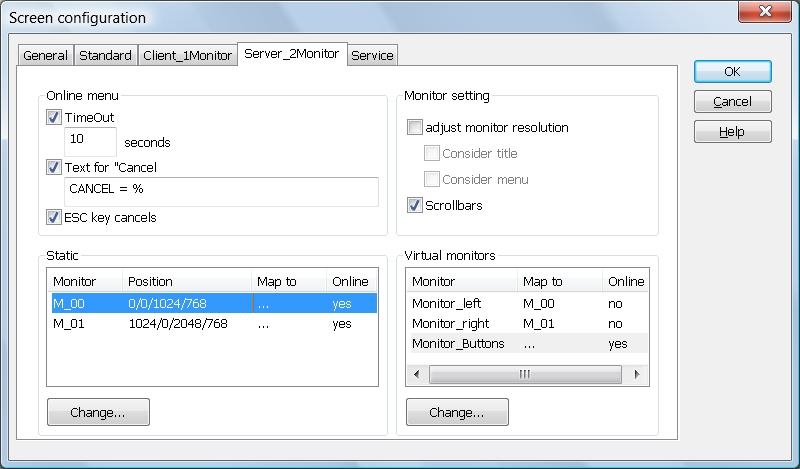
The first configuration is for our server with two monitors.

The Screen setting offers you 2 options:
|
Adjust screen resolution |
|
Scrollbars |
If the option Adjust screen resolution is activated, the pictures will be adjusted to the current screen resolution independet of the gerneral settings.
If this option is not active, the resolution / screen size keeps the engineered size independent of the settings for your computer. Here the second option Scrollbars can be very useful, as it allows to navigate even in pictures larger than the current monitor.
The settings Online menu offer the following possibilities.
Now it is possible to select online, i.e. in the Runtime, where a certain picture should be opened. So I can decide in the Runtime, whether my alarm list should be opened on the left or the right monitor. If this option is activated, the following options for the online menu can be defined:
|
Timeout |
This means, that the menu is closed after the defined time without switching to another picture. |
|
Item Cancel |
This allows to cancel the action. The caption can freely be defined. The character % defines, that the timout time is counted down visibly. So you can see, when the action is cancelled automatically. |
|
ESC-Key |
This option allows to cancel the action with the ESC key. |

Above we see an example of an online menu with out configuration. M_00 and M_01 are the names of the real monitors, where the selected picture can be opened. CANCEL=9 means that the action will be cancelled in 9 seconds.
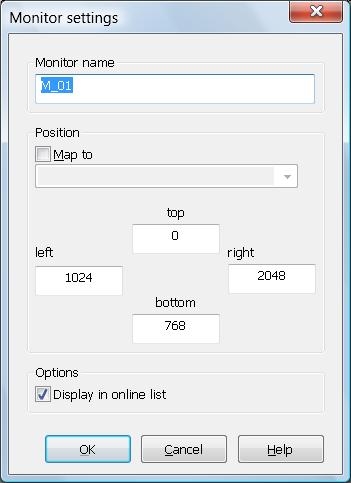
In the monitor settings we enter the settings of our real monitors.
The name can freely be defined. We will deal with the option Map to later.
The position defines the coordinates of the monitor resp. which area of the graphics card will be displayed on the monitor. The pixel coordinates are entered.
The last option allows us to make this monitor available in the online selection. In this case the monitor will be available in the selection menu in the Runtime.
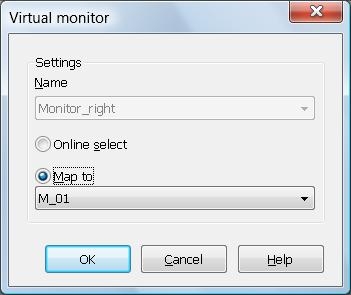
The virtual monitors offer the following settings:
The name is displayed for information. Now we have th choice between Select online, i.e. selecting the monitor in the Runtime, or Map to. This defines a fixed connection between a virtual and a real monitor.
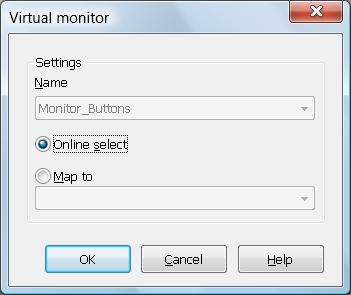
Our monitor for the button bar should be selected online. So the dialog looks like this.