
How to Demonstrate CitectSCADA FastLinx™
Training for Equity University 2005
Technical Paper
October 2005


Abstract
This paper outlines how to demonstrate CitectSCADA FastLinx™.
Contacts
support@citect.com
Dynamic Linking
- Start Unity Pro XL
- Create a new project and Select a Quantum PLC, does not matter which one

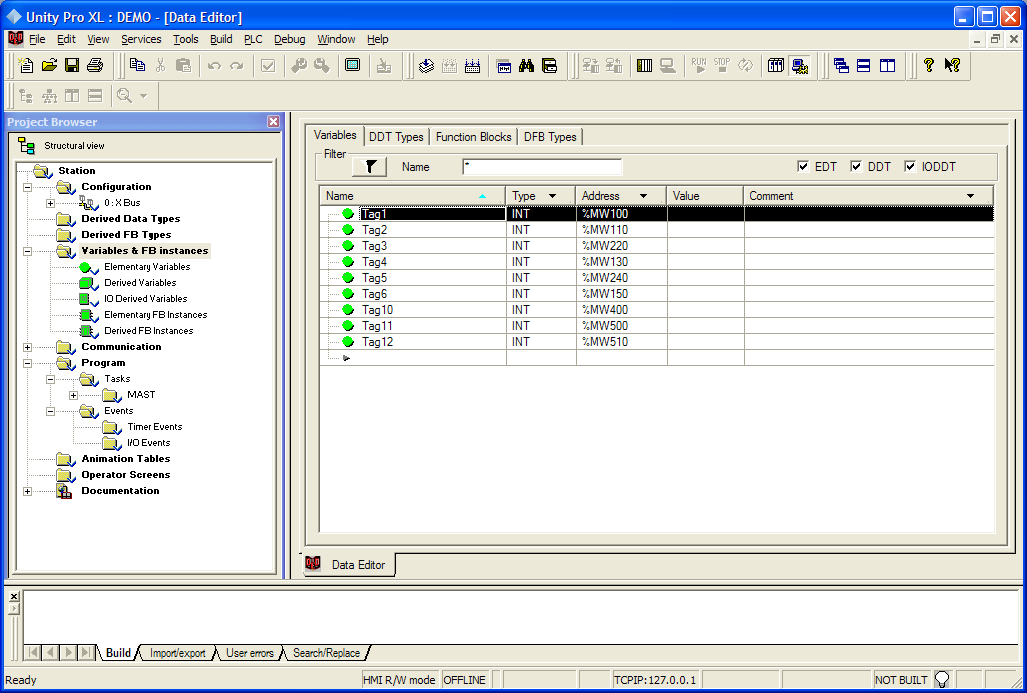
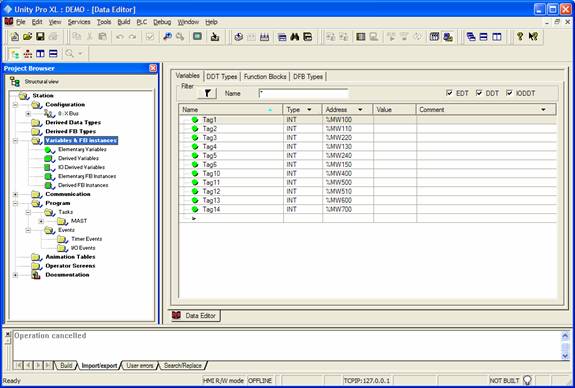
- When the project is created double click “Variables & FB Instances” to add some I/O into Unity Pro as listed below.
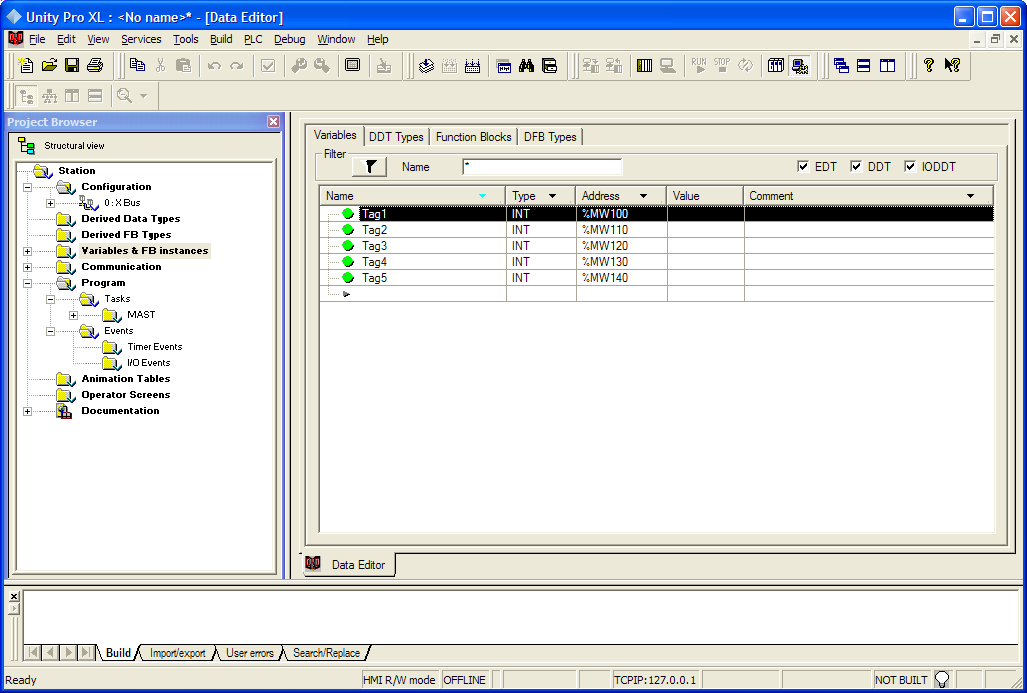
- Save the project and remember
what name (DEMO.STU) you give it and where the project file is
saved as you need it when configuring CitectSCADA.
- Start CitectSCADA
- Create a new project in
CitectSCADA
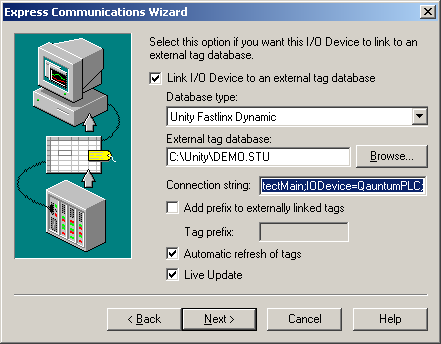
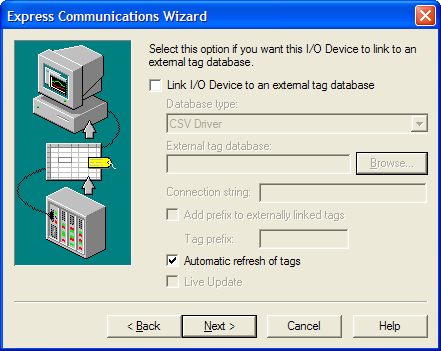
- Use the Express Wizard to setup the communication with the Quantum PLC
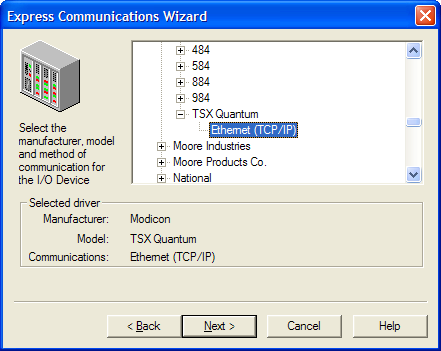
- Just put 1.2.3.4 as the IP address as no communication will be needed in this demo.
- In the Link external database form select Schneider FastLinx Dynamic in the drop down list
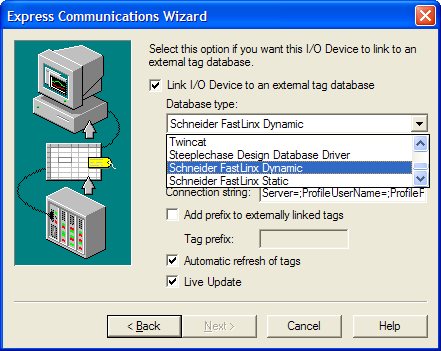
- In the External Tag Database
field browse to the DEMO.STU file that you saved in
step 4.
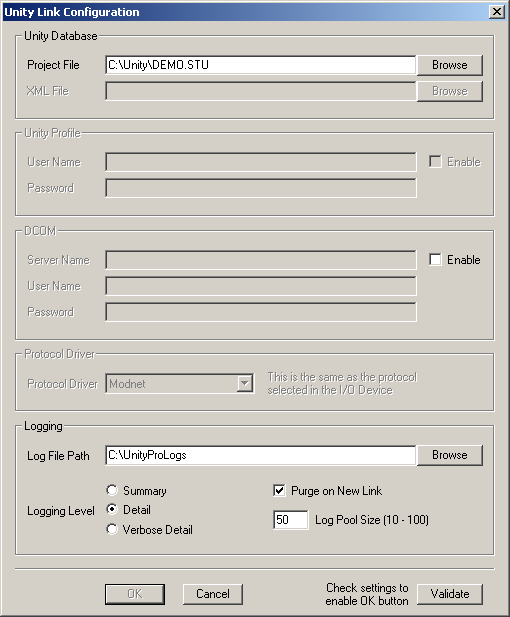
Click on Validate, to test that the connection to the DEMO.STU file
is successful.
Leave the connection string as it is.
- When it is done, it should look like this:
- Continue through the wizard
without changing anything
- When completed, CitectSCADA will connect with Unity Pro and synchronize all available tags created in the DEMO.STU project.
- Open the Variable Tag form in CitectSCADA Project Editor and you will see it sync again, this is so that it will get any changes made from the Unity Pro source database.
- You should now have all Compatible Variable tags configured in Unity Pro available in CitectSCADA.
- Go back to Unity Pro
- Add some more tags and change some addresses on some of tags already created… AND SAVE THE UNITY PRO database!!!
- Go back into CitectSCADA and open the Variable Tag form, it should now automatically sync
- Until now we have only read tags from Unity Pro into CitectSCADA, this is what happens 95% of cases in the real world. But for demo purposes we will also write Variable Tag information from CitectSCADA to Unity Pro.
- Open your Variable Tag Form in the Projects Editor and press the Add button
- Change the name of Variable Tag and change the address of the variable tag and press Replace
- Press add again and repeat step 22.
- IMPORTANT!! Go to Unity Pro and close the Project file from the File menu. This has to be done as Unity Pro does not allow more than one client writing to the project file at the same time.
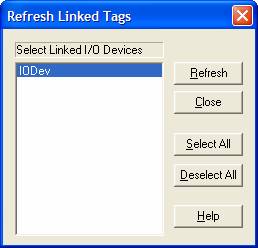
- When the project file is closed go back to the CitectSCADA explorer and from the Tools menu, select Refresh Linked Tags…
- Please make sure that the
Unity Pro project file (DEMO.STU) is closed before you
continue
- Select the IODevice you created earlier and press Refresh.
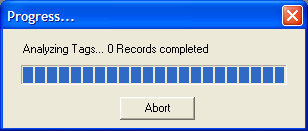
- CitectSCADA will now write the added tags to Unity Pro, this will take some time as Unity Pro is quite slow.

- When it has completed, close the Refresh Linked Tags form
- Go to Unity Pro and open up the DEMO.STU project
- The DEMO.STU project should now have the two added tags from CitectSCADA.
Static linking (Import/Export)
- For static import/export do the following.
- Create a new project in CitectSCADA
- Go through the Express wizard as per described in step 7 and 8, but when you reach the Tag Linking form, DO NOT select any linking!
- Continue to complete the Express Wizard without making any changes. When completed you should have an empty CitectSCADA database with no tags configured.
- Go to Unity Pro and open your DEMO.STU project
- Right click on “Variables and FB Instances”
- Select Export… from the menu
- Select XSY as the datatype, this is a XML type format
- Give it a name (DEMO.XSY) and remember where you save the file
- Unity Pro should now have created a XSY file that can be imported into CitectSCADA
- Go back to CitectSCADA and make sure you have selected the empty project you created in step 33, 34 and 35.
- From the Tools menu select Import and enter the information as described in the picture below
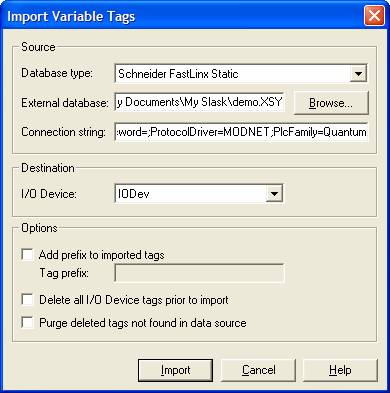
- Make sure you have your DEMO.XSY as the External database and MODNET and Quantum in the Connection String
- The Destination is the CitectSCADA IODevice the Variable Tags will be imported to.
- Press Import and you should have all Variable Tags from the Unity Pro project in CitectSCADA.
Disclaimer
Disclaimer of All
Warranties
SCHNEIDER ELECTRIC (AUSTRALIA) PTY LTD DISCLAIMS ANY AND ALL
WARRANTIES WITH RESPECT TO SCHNEIDER ELECTRIC (AUSTRALIA) PTY LTD
PRODUCTS AND THE RELATED DOCUMENTATION, WHETHER EXPRESS OR IMPLIED,
INCLUDING SPECIFICALLY THE IMPLIED WARRANTIES OF MERCHANTABILITY
AND FITNESS FOR A GENERAL OR PARTICULAR PURPOSE. CITECTSCADA AND
THE RELATED DOCUMENTATION ARE PROVIDED "AS IS," AND YOUR COMPANY
UNDERSTANDS THAT IT ASSUMES ALL RISKS OF THEIR USE, QUALITY, AND
PERFORMANCE.
Disclaimer of
Liability
YOUR COMPANY AGREES AND ACKNOWLEDGES THAT SCHNEIDER ELECTRIC
(AUSTRALIA) PTY LTD SHALL HAVE NO LIABILITY WHATSOEVER TO YOUR
COMPANY FOR ANY PROBLEMS IN OR CAUSED BY SCHNEIDER ELECTRIC
(AUSTRALIA) PTY LTD PRODUCTS OR THE RELATED DOCUMENTATION, WHETHER
DIRECT, INDIRECT, INCIDENTAL, SPECIAL, OR CONSEQUENTIAL (INCLUDING
LOSS OF PROFITS).
Related Links
Attachments