Use the Project Tags datasheet or the New Tag dialog to configure the required properties of a tag:
Figure 1. Project
Tags datasheet
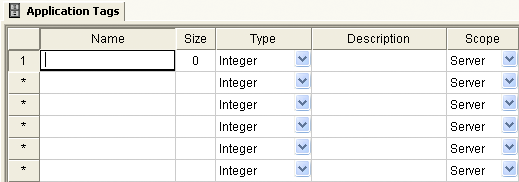
Figure 2. New Tag
dialog
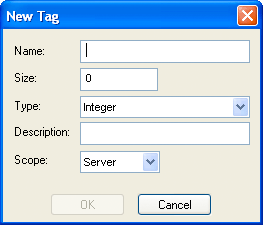
- In the Name field, enter a unique name that follows the proper syntax for tag names.
- In the Size field, enter the maximum index of the tag if it is intended to be an array tag. (If it is not intended to be an array tag, then enter 0.)
- In the Type field, choose the tag's data type (Boolean, Integer, Real, or String) or class from the drop-down list.
- In the Description field, enter a brief description of the tag.
- In the Scope field, choose the tag's scope (Local or Server) from the drop-down list.
Tip: You can
configure the tag's optional properties — such as alarms and
min/max limits — by using the Tag Properties tool.