To view your project, use the following steps:
- Expand the Screens folder and double-click on your Main.scr screen.
- To save the screen in HTML format, click
Save as HTML on the Application
menu.
Web files are stored in the Web folder, so open the folder and verify that you saved the Main screen successfully. You should see main.html.
- On the Project tab of the ribbon, in the Web group,
click Thin Client.
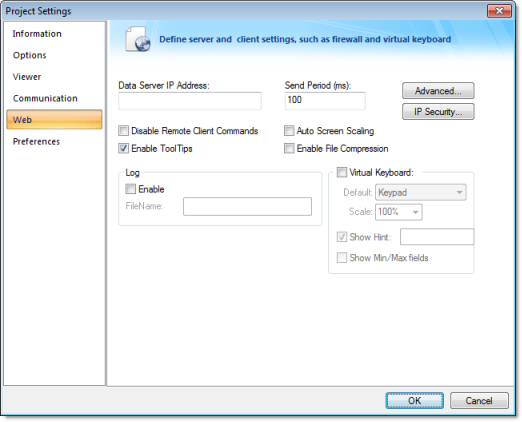
Figure 1. Open the Project Settings dialog

- Configure the Data Server IP
Address to use the IP Address of the Server station
(computer on which you are running) at runtime.
The Thin Client station exchanges on-line data (tag values) with the station specified in this field.
- Type the URL path to your main.html file (in the Web folder) into the URL field.
The URL depends on the Home directory configured in the Web Server of your Server station.
Note: Microsoft provides Web Servers for any Microsoft operating system. Consult your Microsoft documentation about installing and configuring a Web Server. - After configuring the Web settings, click OK to close the Project Settings dialog.
- Save and close all screens and worksheets, and then
verify the project (Verify on the
Home tab of the ribbon) to update the Web settings to your Web
page.
CAUTION:You must verify the project again any time you change the project settings.
To test your Web-based application, use the
following steps:
- Click Run (on the Home tab of the ribbon, in the Local Management group) to run your project locally on the Server station.
- Open an Internet Browser (Microsoft Internet Explorer or Netscape) and type the URL address to open your main.html screen from the Server station.
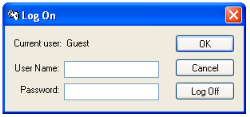
- When the Log
On dialog displays in the Browser, type guest into the User
Name field, then click OK to
open the main.html screen in the Browser.
Figure 2. Log On dialog

Notice that you can modify the level of any tank locally (Server station) using the Viewer run-time module or remotely (Thin Client) using the Browser.
Note: A Thin
Client requires an ActiveX component (ISSymbol.ocx) to handle screens on the Browser. If
you connect the Thin Client to the Internet, this component is
downloaded and registered automatically.