This installs Project Node Software only. The Project Node is the central database for a system. It must be on a PC that is a Web Server running either Microsoft Internet Information Server (IIS). There must be at least One Project Node in a system.
If the Web Server PC is not a SCADA node, the user should install the Project Node software only on the Web Server PC using this option.
Web Server software must be installed prior to installing WebAccess Node software. The Windows 2000 Professional and Server, 2003 Server, XP Professional, Vista Business and Vista Ultimate operating systems provide a Web Server as a standard installation option: Internet Information Server (IIS). If you add IIS to an existing system, remember to re-install the Windows Service Pack. See 2.1.1 IIS required on Project Node for more information.
A TCP/IP service is also required. WebAccess configuration is through an Internet Browser (IE 6.0, 7.0 or 8.0) and ASP (Active Server Pages).
Note - XP Home does not have web server software and cannot be a Project Node.
Please refer to section 1.4.1 Project Node - System Requirements for more information.
By making the Project Node a separate PC, you can increase the security of your system. SCADA nodes are the important items in a control system; they connect to the actual control system. Adding a web server to a SCADA node makes your SCADA node vulnerable to the outside. SCADA nodes will run happily without the project node after they are downloaded. The project node is only needed: 1) to configure a new project or edit a project database, 2) to download the database configuration to a SCADA node 3) to provide the initial connection of a Web Browser client to the SCADA node 4) provide snapshot images to Thin Clients.
Installation Option 2 will Install Project node software only. This will make this PC a Project Node. (It will disable SCADA node if SCADA node software was previously installed). It is intended for network architectures where the Web Server (Project Node) is separate from any SCADA nodes. This might be done for security, administrative or cost reasons. Project Node software is a collection of ASP pages that are "served" by a web server to client web browsers. Install Option 2 will install Project Node software (ASP files), the centralized database (bwCfg.mdb), and DrawDAQ.
No Hardkey or License file is required
for Project Only Node.
Note - option 2 (Install
only Project Node) will convert an existing SCADA or combined
Project/SCADA node to be a Project Node Only.
Use this option to install WebAccess Project node software only. This will convert any PC to a Project Node, including a node that already has SCADA node software installed.
1. Insert the WebAccess CD into your CD-ROM drive.
The
installation program automatically starts up if autorun is enabled
on the PC. If the Install program does not start automatically,
open explore, browse to the CD and double click on setup.exe
2.
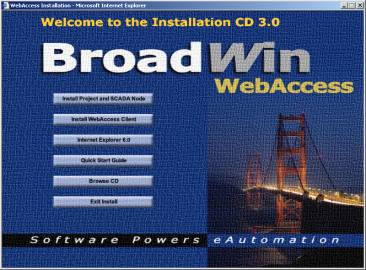
You will see the Welcome to the Installation CD html
page.
3.
Select - Install Project and SCADA Node (even though we are
installing only Project Node software).
(Optionally, download and run the WebAccessUSANode.exe from the FTP site).
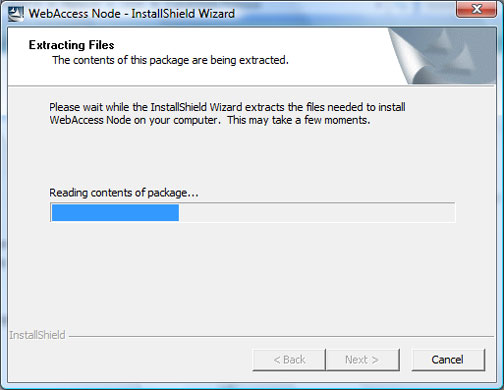
4. The Install Shield Program starts.
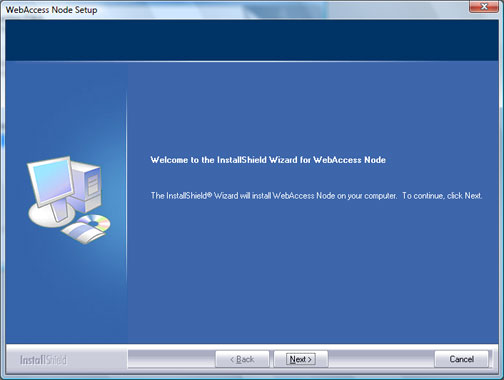
5.
A Welcome to Install Shield screen is displayed.
To continue, click Next.
6.
The WebAccess License Agreement displays. Please carefully
read the License Agreement. Clicking No will end Setup. To accept
the License Agreement and
to continue with Setup, click
Yes.
7.
Enter your Customer Information (user name and company).
To continue, click Next
8.
Select Options to install. Select Project
Node.
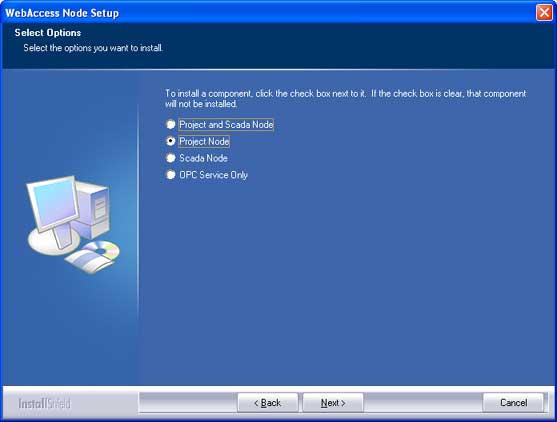
Different questions will be asked depending on which option is picked. This assumes you want a single PC to have only Project Node software.
9. Destination - Folder where setup will install WebAccess SCADA Node program and Project Configuration files. To continue, click Yes.
Note - It is recommended to accept the default directory (drive:\WebAccess\Node) unless you are very experienced user and have a good reason. If you are changing the default location, type the entire path (DO NOT ENTER ONLY A DRIVE LETTER).
10.
Enter a
Remote Access Code. This is HIGHLY RECOMMENDED.
It will prevent unauthorized users from hijacking your Project Node
(Web Server) or SCADA node. 32 characters maximum. You
can only modify this Remote Access Code using the installation
program.
11. Primary TCP Port - If data must pass
through a Fire Wall, enter the Firewall Primary Port
(i.e. TCP Port).
Note - 0 = the
default port number (4592)
If you are
not using a firewall, accept the default (0).
To continue, click Next.
12. Install ASP Files
- Confirm the WWWRoot directory to Install ASP files.
This is the directory used by IIS (internet Information
Server) Web Server. WebAccess creates a subdirectory
(\broadweb) and installs the ASP Files that are served by the Web
Server to clients as the configuration tool (Project
Manager). To continue, click Yes.
Note - it is
recommended not to change this unless you are an experienced user
and there are more than one WWW server or more than one operating
system image installed.
If the path drive:\InetPub\wwwroot does not appear, then Internet Information Server (IIS) is not installed on this PC. You should cancel installation and install IIS (Internet Information Server) from your Windows Installation CD. See 2.1.1 IIS required on Project Node for more information.
13. WebAccess Node Setup will install files to the directories above.

14. WebAccess Node Setup will adjust security for WebAccess files.

16. Install Wizard
Complete
Select, Yes I want to restart my computer now.
To continue, select Finish.
17. If you have the BEMS package, the BEMS license is installed manually by copying the License File (BwPServe.exe) to drive:\WebAccess\Node. The matching Hardkey also must be installed on the Project Node. Otherwise, skip this step. There is usually no Hard Key or license required for Project Node only.
After reboot, you should see the
WebAccess Icon ![]() in the taskbar next to the system clock.
in the taskbar next to the system clock.
![]()
If you hold the mouse over on the
WebAccess Icon ![]() in the taskbar, you should see the
version number of the software.
in the taskbar, you should see the
version number of the software.
![]()
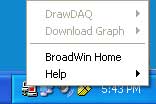
Install
Project Node software also installs DrawDAQ and
Download Graph. If you click on the WebAccess Icon
![]() in the taskbar, you should see both DrawDAQ
and Download Graph listed in a pop-up menu. (Note that they
are grayed if there are no projects created, which is true if you
have just installed WebAccess).
in the taskbar, you should see both DrawDAQ
and Download Graph listed in a pop-up menu. (Note that they
are grayed if there are no projects created, which is true if you
have just installed WebAccess).