Right-click the new event.
Select Properties.
The Machine Edition Inspector opens.
Select the following.

|
Name |
|
|
Event Type |
|
|
Event Trigger |
|
|
Data/Time |
|
|
Project Type |
|
|
Project List |
|
Name |
Scheduled event name.
Default: The name that was entered in the Proficy Machine Edition InfoViewer left pane tree. The name can be changed in the Name field.
|
Event Type |
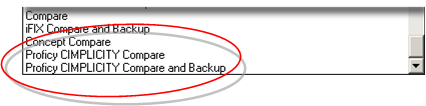
Select one of the following:
|
Event Type Option |
Description |
|
Proficy CIMPLICITY Compare |
|
|
Proficy CIMPLICITY Compare and Backup |
Notes
|
|
Event Trigger |
The trigger that will initiate the selected event type.
Options are:
|
Event Trigger Option |
Description |
|
|
The trigger initiates the event type at regularly selected intervals. |
|
Manually |
The event can be triggered manually through the Event Scheduler. |
|
Date/Time |
Scheduled event's start date and time.
|
Project Type |
(Read-only) The type should be Proficy CIMPLICITY.
|
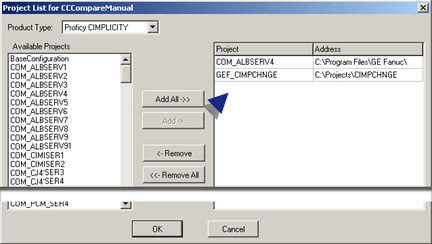
Project List |
Opens a Project List for <Event Name> dialog box that list every Proficy CIMPLICITY project and computer project that are on the Proficy Change Management server.
Note: Click the button that displays when the Project List field is selected or double-click the field.
Add a project that will be included in the scheduled event to the list in the right column of the dialog box.
Add the project path on the local server in the Address field.
Note: The Scheduler runs on the local machine.
Continue to add and enter the address for all of the project that will be included in the scheduled event.
Click . to close the dialog box.
Continue creating and configuring as many events as required.
Right-Click Scheduler Event List in Proficy Machine Edition window left pane.
Select Check in Scheduler Settings on the Popup menu.
Result: The events are set on the Proficy Change Management server as follows.
|
Files |
Address |
|
Computer |
BSM_Root |
|
CIMPLICITY Project |
Path to project's .gef file. |
|
|
Proficy Change Management client. |