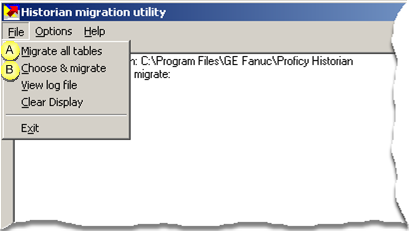
Click File on the Historian migration utility menu bar.
Select either of the migration options.
|
A |
Migrate all tables |
Migrate all available tables in the SQL database to Historian.
Available tables include:
![]() DATA_LOG
DATA_LOG
![]() ALARM_LOG
ALARM_LOG
![]() EVENT_LOG
EVENT_LOG
![]() Important: SPC log tables and GROUP_LOG tables
are not included in the
migration.
Important: SPC log tables and GROUP_LOG tables
are not included in the
migration.
|
B |
Choose & migrate |
Migrate a subset of tables.
Choices include the following.
|
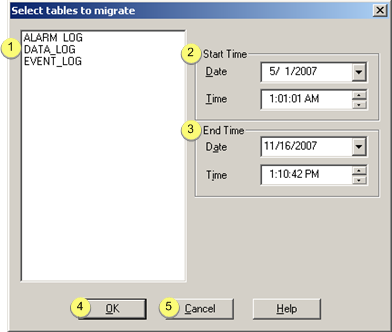
Tables available for migration |
|
One or more of the available tables can be selected for migration. |
||
|
Start Time |
Date |
Month/Day/Year of data that should be selected as the first data in the migration. Note: Click the button to open a calendar on which you can make the selection.
|
||
|
|
|
|
Default |
1/ 1/1969 |
|
|
|
Time |
|
Hour:Minute Second (AM or PM) of data that should be selected as the first data in the migration. |
|
|
|
|
Default |
1:01:01 AM |
|
|
|
|
The default date and time migrates all data up to the selected end time. |
|
|
End Time |
Date |
Month/Day/Year of data that should be selected as the last data in the migration. Note: Click the button to open a calendar on which you can make the selection.
|
||
|
|
|
|
Default |
Current date. |
|
|
|
Time |
|
Hour:Minute Second (AM or PM) of data that should be selected as the last data in the migration. |
|
|
|
|
Default |
Current time. |
|
|
|
|
The default migrates data from the start date to the most current. |
|
|
OK |
Closes the Select tables to migrate dialog box. The migration begins as soon as the dialog box is closed. |
|||
|
Cancel |
Cancels the migration. |
|||
![]() Important: The same start time and end time are
used for each selected table during the migration session. The
selections apply to the one migration session only. Once completed,
settings revert to the default settings.
Important: The same start time and end time are
used for each selected table during the migration session. The
selections apply to the one migration session only. Once completed,
settings revert to the default settings.
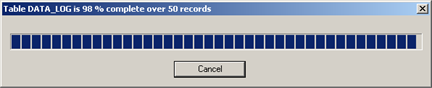
Result: Migration occurs after you select either option. A status bar displays migration progress.
|
|
Proficy Historian migration. |