Click the Point menu button to the right of an expression field that applies to your configuration.
|
Text example |
|
|
Rectangle example |
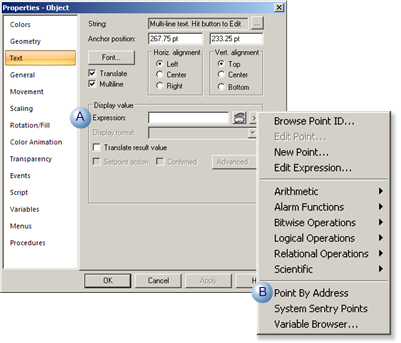
Text Example
Select a list item that enables you to enter a point or expression, e.g. Text.
Do the following.
|
A |
Click the button to the right of the Expression field. |
|
B |
Select Point by Address on the Popup menu. |
Result: The Point by Address dialog box opens.
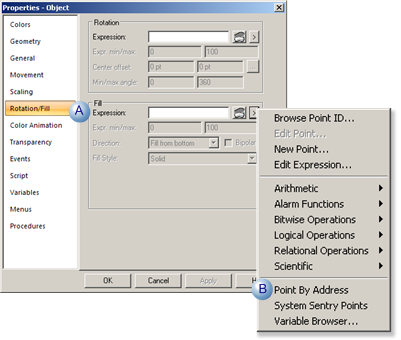
Rectangle Example
Select a list item that enables you to enter a point or expression, e.g. Fill/Rotation.
Do the following.
|
A |
Click the button to the right of the Expression field. |
|
B |
Select Point by Address on the Popup menu. |
Result: The Point by Address dialog box opens.
![]() Note: Instead of selecting Point by Address you
can select Browse Point ID or New Point from the Point ID popup
menu. Choosing the former you will complete the System Sentry part
of your object configuration; choosing the latter will open the New
Point dialog box.
Note: Instead of selecting Point by Address you
can select Browse Point ID or New Point from the Point ID popup
menu. Choosing the former you will complete the System Sentry part
of your object configuration; choosing the latter will open the New
Point dialog box.
|
|
System Sentry point by address on a CimEdit screen. |