The WYSIWYG Form file must be published/added to the project in order for it to be available during runtime.
Right-click WYSIWYG Forms in the TrackerCfg_UI left pane.
Select Add/Publish on the popup menu.
![]()
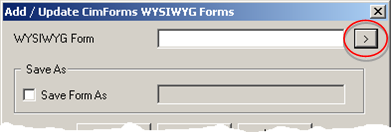
The Add /Update WYSIWYG Form dialog box opens.
Click the button to the right of the WYSIWYG Form field.

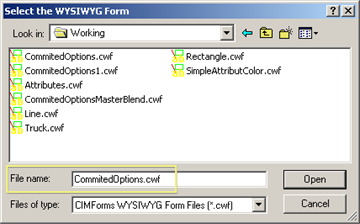
The Select the WYSIWYG Form dialog box opens.
Open the <Project Name>\CIMForms\WYSIWYGForms\Working folder.
Select the file you want to compile.
The file type is
|
CimForms WYSIWYG Form files (*.cwf) |
Files that were created and saved or were edited and saved as *.cwf files in the in the WYSIWYG Text Editor. |

Click .
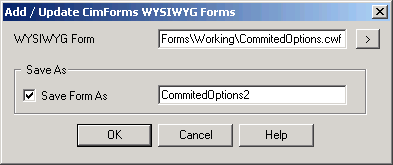
The Add /Update CimForms WYSIWYG Forms dialog box displays the path and file you selected.
The options are as follows.

|
Option |
Description |
|
WYSIWYG Form |
Path and file name are automatically filled in when the file is selected in the Select the WYSIWYG Form dialog box. Path and filename can also be typed in. |
|
Save Form As |
Check to be able to change the name of the form. |
|
|
Broadcast saves the file as a .cwf file. You do not need to include the file extension. |
Click .
An WYSIWYG Form Properties dialog box opens.
The ASCII Form Properties dialog box provides the following information.

|
Field |
Description |
|
|
Name of the selected file or of the name entered in the Save As field. |
Read only |
|
|
Count of the number of times the file has been published. |
Read only |
|
|
Description that will help users know the content and intended use of the added file. |
Read/Write |
|
|
Published Date and Time |
Last time the file was published. |
Read only |
|
Windows logged in User ID |
Read only |
|
Click .
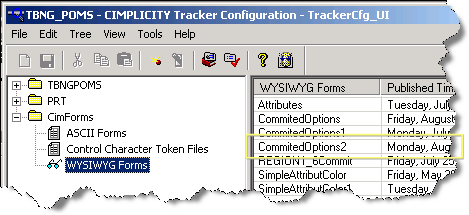
Result: When you add/publish a WYSIWYG form the Broadcast:
Adds the file to the list of published files in the TrackerCfg_UI right pane.

Saves the file in the <Project Name>\CIMForms\WYSIWYGForms\prod folder.

You can update or delete a published form.
|
Update a published WYSIWYG form. |
|
|
Delete a published WYSIWYG form. |
|
WYSIWYG form configuration. |