Click Advanced.
Advanced fields display at the bottom of the advanced PRT Route Configuration dialog box.
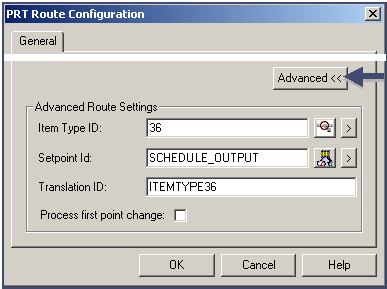
Configure the Advanced fields, as follows.
|
Field |
Enter |
|
|
Item Type ID |
The name of the item type that will most likely travel between the source and destination regions. Entries and resulting types allowed are as follows. |
|
|
|
Entry in Item Type ID field |
Types allowed along the route |
|
|
Nothing. Field is blank. |
All item types. |
|
|
A specific type. |
Only the entered type. |
|
|
* with other characters |
Item types that match the pattern. Example A* allows all item types that begin with A. |
|
|
* only |
All item types. This is the same as leaving the field blank. |
|
Setpoint ID |
The point ID that will display when the item is transitioned.
The
|
|
|
Translation ID |
An ID that will map to the translation ID in the PRT item Type Translation file. Note: The PRT Item Type translation file translates item type codes received from detection devices into item type IDs that can be recognized by Tracker. This file must be configured when the prt_route records have a translation type value of 2.
|
|
|
Process first point change |
Checked, makes Tracker accept any change, including a null value. Note: By default Tracker does not respond to null values. When a point changes from null to a value Tracker assumes that it was a loss in and a return to communications. If you are using unsolicited communications where a null may be valid; when the point value changes from null to a value you want that to be valid for the route. Process first point change makes the change valid. |
|
Click OK.
The route, which is listed in the Route dialog box, is added to the Tracking Model configuration.
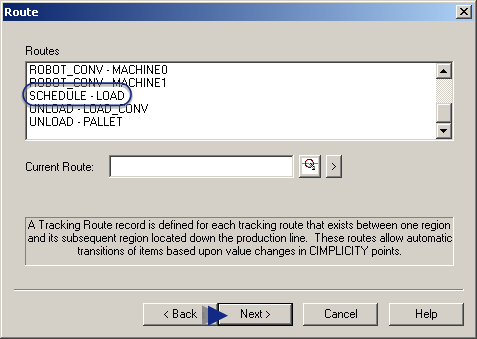
Click Next when you have finished configuring routes.
Result: The Item Types dialog box displays.
|
|
Step 4. Configure routes. |