Tracking Model Wizard
Note: The Tracking Model Wizard facilitates setting up a Tracker project. You can also open the PRT Route Configuration dialog box by clicking Advanced>Routes in the TrackerCfg_UI left pane.
![]() Important: Make sure you have
configured at least two regions before you begin to configure
routes.
Important: Make sure you have
configured at least two regions before you begin to configure
routes.
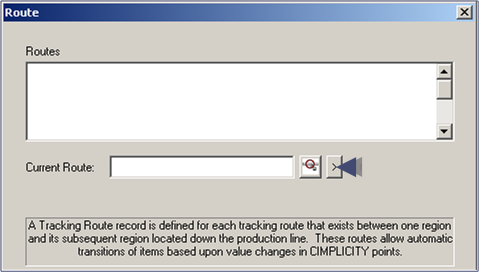
Click ![]() to the right of the Current Route field in the Wizard's
Route dialog box.
to the right of the Current Route field in the Wizard's
Route dialog box.
Select New.
The PRT Region Configuration dialog box opens.
Route configuration steps
|
Set general route parameters. |
|
|
Set advanced route parameters. |
|
|
PRT model configuration using the Tracking Model Wizard. |