Lock the folder in which you are going to place the Routing Control Object.
(Optional) Create a new folder.
Do one of the following.
![]() Click File>New on the
TrackerCfg_UI menu bar.
Click File>New on the
TrackerCfg_UI menu bar.
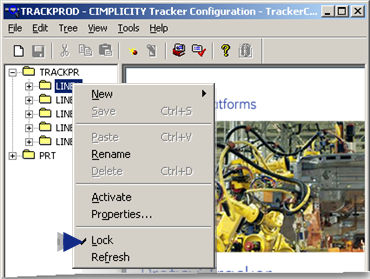
![]() Right-click the folder; select
Routing Control Object from the Popup menu.
Right-click the folder; select
Routing Control Object from the Popup menu.
A new folder displays at the bottom of the selected folder's tree.
Name the folder.
![]()
Do one of the following to create a new Routing Control Object.
Method 1
Click File>New>Routing Control Object.
Method 2
Right-click the RCO folder.
Click New>Routing Control Object on the Popup menu.
![]()
Result: A New_Site icon is created in the TrackerCfg_UI left pane.
The New_Site displays the following.
![]()
|
A |
Three subfolders are automatically created with the new site. |
|
|
|
|
B |
Configuration continues in right pane. |
![]() Tip: Organize information
in the directory by creating folders. From the File menu, select
New>Folder and a folder icon will display in your directory. You
can then drag and drop sites into and between folders.
Tip: Organize information
in the directory by creating folders. From the File menu, select
New>Folder and a folder icon will display in your directory. You
can then drag and drop sites into and between folders.
|
|
Step 3. Configure a Routing Control Site. |