Module configuration |
|
Manual -> Process Gateway -> Configuration Access DNP3 -> Module configuration |
Module configuration |
|
Manual -> Process Gateway -> Configuration Access DNP3 -> Module configuration |
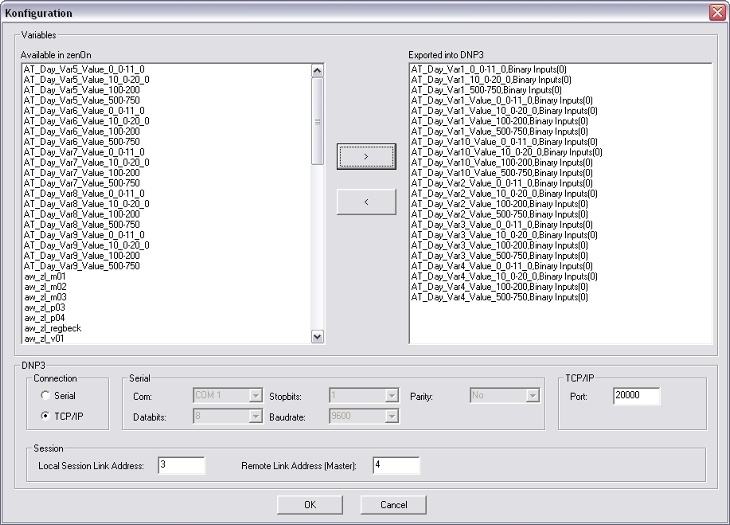
After clicking the configuration button the following dialog opens:

Here the variables that should be connected can
be selected. On the left-hand side all variables which are
available in zenon are displayed. You can select them there and
move them to the DNP3 export list with the button >. You can remove them from the
export list with the button <.
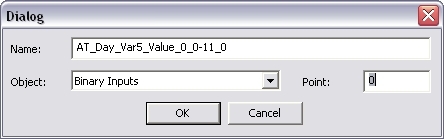
If a variable is moved to the export list, a dialog for the name assignment of the zenon variable to an object and point number in DNP3 opens:
The variables selected in this way then are available in the DNP3 slave and are continuously synchronized between zenon and the DNP3's object database.
In the lower part of the configuration dialog the serial resp. TCP/IP connection for the DNP3 slave can be configured.
The following settings are available for the configuration of the serial interface:
|
COM |
the serial interface for the access to the DNP3 slave |
|
Databit |
number of data bits (default: 8) |
|
Stop bit |
number of stop bits (default: 1) |
|
Baudrate |
baudrate of the serial interface (default: 9600) |
|
Parity |
parity setting even/odd/no (default: no) |
For the configuration via TCP/IP only the listener-port can be defined; it should be 20000.
For the DNP3 session the local (slave's) session link address and the remote (master's) session link address must be configured. Only one active session is supported. It does not matter if serial or TCP/IP is used.