The most common use of screen scripts is to provide enhanced animation. This example describes how to rotate a FAN based on the ON/OFF state of the fan. Please refer to Chapter 12 Scripts for detailed description of Scripts in WebAccess.
This example uses is a "trick" widget that connects to two tags. Normally, a widget is built with only one tag. In this example, the first tag is the IO tag that describes the on off state of the Fan or Pump (the Discrete Tag). The second "trick" tag is an analog-type Local Screen Tag that will loop from 0 to 359 when the IO Tag is ON.
The "trick" to using this two-tag widget ($FANBLADES.dwt) is to name the local screen tag after your IO tag by appending the word "rotate" to it. (if you are using long tag names, try using just the letter "r" instead of "rotate"). If your digital IO Tag is named FANSTART then you should create a screen tag named FANSTARTrotate.
Note - Local Screen tags are limited to 15 characters. If your IO tag is more than 9 characters in length, you can use any name for the Local Screen tag and then edit the Widget to use the actual Local Screen Tag name.
A summary of the steps are:
· Start DRAW.
· Edit your Graphic Display (Open DRW).
· Create a Local Tag File with an analog-type Screen Tag named after your digital IO Tag (with rotate appended to end)
· Create a Script that Loops TAGrotate if TAG is true
· Attach the Script and Tag file to your Graphic
· Draw the Widget.
· Edit the Widget to make sure the rotate animation is attached to the analog Local Screen Tag (TAGrotate).
1. Start DRAW
2. Open the DRW file of the Graphic Display you want to add this Widget.
3. Create a Local Tag File with an Analog Tag.

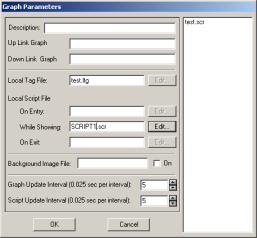
Figure 10.43 Set Graph Parameters
a. Select File -> Set Graph Parameter
b. Select the field next to Local Tag File
c. Select Edit

Figure 10.44Local Tag file (screen tags) - DRAW
d. Enter a name for your Tag File ( I name these after my graphic display).
e. Enter the "trick" Tag Name
It should be named after your IO Tag by appending the word "rotate" to it. If your digital IO Tag is named FANSTART101 then you should create a screen tag named FANSTART101rotate.
f. Check Point Type = Analog
g. Enter Span High = 359 (it can be any number but my example script was designed for this)
h. Select Add/Modify
i. Select OK
j. Select Save
k. Select OK
l. Select Exit
m. Select your Tag File name to attach it to your Graphic as the Local Tag File
4. Create a script
a. Open Set Graph Parameters Dialog box (it should still be open).
b. Select the field under Local Script File next to, While Showing:
c. Select Edit

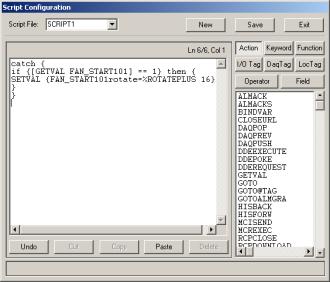
Figure 10.45Script Editor - DRAW
d. Copy and Paste the following Script into the Script Editor.
catch {
if {[GETVAL FAN_START101] == 1} then
{
SETVAL
{FAN_START101rotate=%ROTATEPLUS 32}
}
}
e. Edit the script to use your tag names. Replace FAN_START101 with your digital IO Tag.
f. Replace FAN_START101rotate with your analog local screen tag (Step 3.e above).
g. Enter a name for your Script File (I name mine after the graphic).
h. Select Save
i. Select Exit
j. Click on your Script File Name to enter it in the While Showing field
5. Adjust the Screen Update and Script Update rate to get faster spin.
a. (Use Set Graph Parameters Again. I use 5 = 5*0.025 sec = 0.125 secs)
b. Select OK to close the Set Graph Parameter dialog box
6. Draw -> Widget
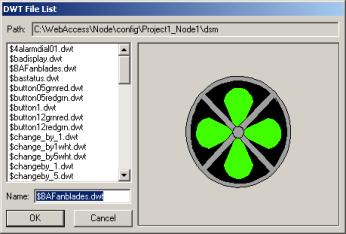
7. Select $FANBLADES.dwt

When you draw the widget, it asks for a tagname. Enter you digital IO Tag (FANSTART101 in the example. The trick is that I have already inserted a partial tagname (rotate) in the spot for the rotation animation. The Start/Stop animation takes the tagname you enter AND inserts your tagname in front of the partial tagname "rotate".
8. Save and download your Graphic.
If you have multiple Fans on a graphic, you must add additional screen tags and edit the script by repeating the test.
catch {
if {[GETVAL FAN_START101] == 1} then
{
SETVAL
{FAN_START101rotate=%ROTATEPLUS 16}
}
}
catch {
if {[GETVAL FAN_START102] == 1} then
{
SETVAL
{FAN_START102rotate=%ROTATEPLUS 16}
}
}