You cannot Start ViewDAQ unless a Project has been configured and Downloaded to the SCADA Node.
There are two ways to start ViewDAQ locally on the SCADA Node:
1. Start the SCADA Node kernel, if it is not already started.
2.
Double Click on the Green WebAccess Icon ![]() in the Taskbar (System Tray) next to
the clock to open the Taskbar Icon.
in the Taskbar (System Tray) next to
the clock to open the Taskbar Icon.
3. Welcome to ViewDAQ appears without Toolbars (Figure 2-19).
4. Press the Enter key or Right Click the mouse to view the Main.bgr and toolbar.
Figure 2-19 ViewDAQ Welcome - no toolbar - Press Enter to continue
1. Start the SCADA Node kernel, if it is not already started.
2.
Click the Green WebAccess Icon ![]() in the Taskbar (System Tray) next to
the clock to open the Taskbar Icon.
in the Taskbar (System Tray) next to
the clock to open the Taskbar Icon.

Figure 2-20 Start ViewDAQ from Taskbar Menu
3. Move the Mouse to the ViewDAQ menu item.
4. Click once on ViewDAQ.
5. Welcome to ViewDAQ opens without Toolbar (Figure 2-19).
6. Right Click or press Enter to view the Toolbar and Main.bgr
Note – if the Start-up Option in SCADA Node properties is Start Kernel and View, then ViewDAQ will start when the SCADA Node reboots.
Note 2 - If you have a SCADA node only (i.e. there is no Project node software installed on this PC) then the menu looks slightly different (there is no DrawDAQ or Download Graph). See Figure 2-20a
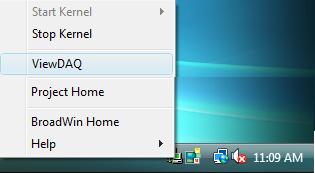
Figure 2-20a - Start ViewDAQ from Taskbar Menu - SCADA node only