This is the easiest and fastest way to copy all the tags, recipes, schedules, scripts and Graphics from on PC to another. The only thing not copied is the Project Data (User Names and Passwords).
Import SCADA node is most commonly used to:
· Move work from a technician's laptop (or central server) to the customer's Project.
· Copy demo system for training.
· Copy a starting system configuration into a new project.
· To break a project up into multiple projects.
· Aggregate multiple projects into one larger project with multiple SCADA nodes.
Import SCADA Node will not over-write an existing SCADA node. Import SCADA Node only adds a new SCADA Node to your project. If you try to import a SCADA Node with the same name as an existing SCADA Node, you will be forced to rename the node before you can import it.
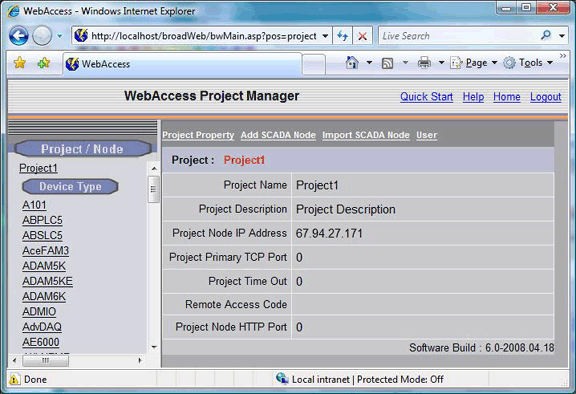
Imports SCADA node is found on the Project Main Page.

Figure 2-39 - Project Property Page - Import SCADA Node
1) Log in to Web Project Manager
2) Select your Project.
3) Select the Project Name
4) Project Page appears (Figure 2-39)
5) Select Import SCADA Node (Figure 2-39).
6) The Import SCADA Node page appears (Figure 2-40).
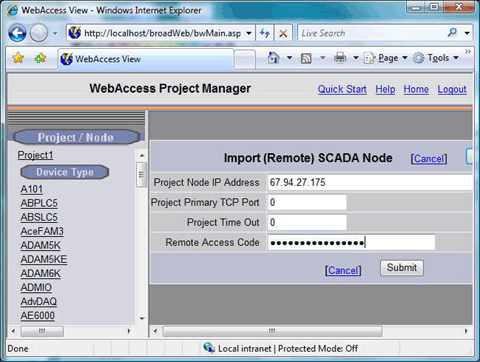
Figure 2-40 - Import SCADA Node
7) Enter the IP address (or network address) of the Source Project.
8) Enter the Remote Access Code and TCP Ports used by the Source Project.
9) If this is a large project, you may want to increase the Timeout period to enable the scripts to run.
IMPORTANT! You must know the Remote Access Code and Firewall TCP Ports of the Source Project Node to copy data from it.
10) Press Submit.
11) A list of all SCADA Nodes on the Source Project appears (Import Remote SCADA Node, Figure 2-41).
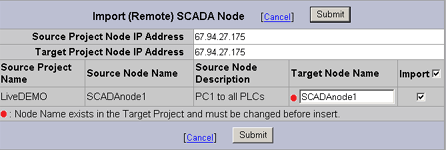
Figure 2-41 - Import (Remote) SCADA Node
12) Check all, some or one of the SCADA Nodes to import.
13) You can rename the SCADA node before importing it. A warning appears if SCADA node exists with the same name in your project.
14) Press Submit, to begin importing files. This can take several minutes (10 or 20) for a large project with many graphics. The progress is shown in a List of file types copied.
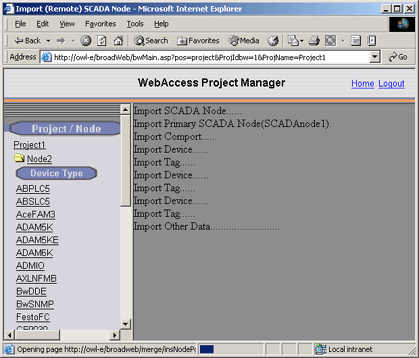
Figure 2-42 - Import SCADA Node Import List of data
15) A dialog Box appears when complete.
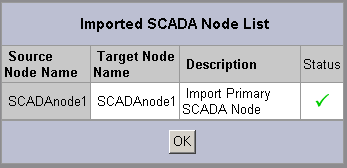
Figure 2-43 - Import SCADA Node success!
16) Click OK (Figure 2-43).
17) Click Home
18) Click Update.
19) The Update Project page appears (Figure 2-44).
20) Change the IP Address for the Project Node and the SCADA node to match the IP address of your PC.
21) If the remote access code, TCP Port or other differences exist, update them now.
22) Click Submit.
23) You are now ready to download and start your new SCADA node.