The Project Tags folder contains all tags created and customized by the user. You can create project tags for displays, to read from and write to field equipment, for control, to perform mathematical calculations, and so forth.
To update a list of project tags, right-click on the
Project Tags folder (or
Datasheet View icon ![]() ) and select
the Refresh option.
) and select
the Refresh option.
To create a new tag, right-click on the Project Tags folder, the Tag List sub-folder, or Datasheet View icon and select Insert Tag from the shortcut menu. You also can click Tag on the Insert tab of the ribbon.
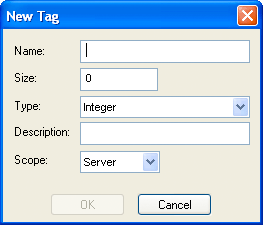
- Name field: Type a name for the new tag. The first character must be a letter and you can use up to 255 characters in the name.
- Array Size field: Type a value to specify the size of the tag. Any size greater than 0 implies that the tag is an array.
- Type combo-box: Select a standard tag type from the list (Boolean, Integer, Real, or String). You also can define new types as structures formed by the classes.
- Description text box: Type a tag description for documentation purposes.
- Scope combo-box:
Click to select one of the following options:
- Local: Select if you do not want to share the information in this tag over the Internet.
- Server. Select if you want to share the information in this tag over the Internet.
These options have no affect on projects that do not have Web capabilities. If you select a Scope option for a project with Web capabilities, then any object property using the Local tag will not work properly over the Web.
- Tag Property dialog: Click Properties on the Home tab of the ribbon when the tag name displays in the Tag name field or double-click on the tag name in the Tag List subfolder located in the Project Tags folder.
- Project Tags
dialog: Click the Datasheet
View
 icon in the Project Tags folder.
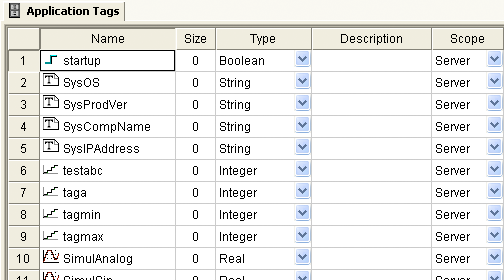
Use this dialog to create, modify, or delete tags or tag properties. You can right-click on a tag property and use standard Windows commands to cut (Ctrl+X), copy (Ctrl+C), or paste (Ctrl+V), any tag and its properties. You can also undo (Ctrl+Z) the last modification to a field.