IWS also enables you to save screens in the HTML format. You cannot create the HTML pages contained in the Web folder directly; instead they are generated from pre-existing screens.
To create an HTML page, you must first create a screen. Configure a screen as you usually would (create objects, add properties, and so on) but keep in mind that this screen will become a Web page. Save the screen as usual when you finish. Then, with the screen still open, click Save As HTML on the Application menu.
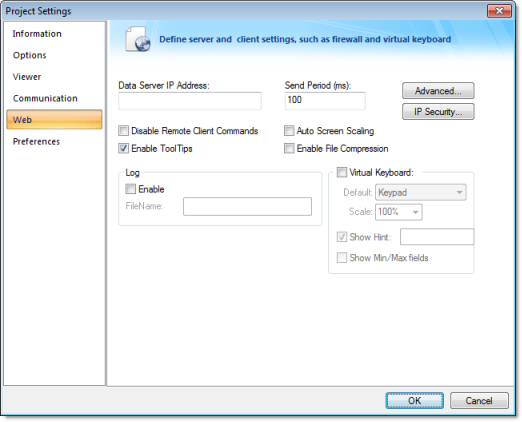
- Open the dialog and type the IP address (from which to run the project) in the Data Server IP Address field.
- Type a value in the Send Period (ms) field to specify the send period (in milliseconds) used to exchange data between the Server and the Thin Client stations.
- In the URL field,
enter the address of the project file using the following format:
http://IP address of the server/path from the server root to the directory containing your Web pages/project name.app
You can also enter a local file path using the following format:
file:///volume name/path to the directory containing your Web pages/project name.app
- Click (enable) the following checkboxes if
applicable:
- Disable Remote Client Commandscheckbox: Click (enable) this box to prevent a remote client from issuing commands from your Thin Client to your Server.
- Enable ToolTipscheckbox: Click (enable) this box to see Windows ToolTips when viewing the project screens on the Thin Client (browser).
- Auto Screen
Scalingcheckbox: Click (enable) this box to automatically
scale screens displayed in a Browser window.
Enable this parameter if you are running remotely on a Thin Client, and you want IWS to scale screens automatically when you resize the Browser window.
- Enable File Compressioncheckbox: Click (enable) this box to compress the files stored in the Web sub-folder of your project folder. This option is useful for reducing download time, particularly if you have a slow connection between your Server and the Thin Client.
- Click the IP
Security button to open the IP Security dialog (see figure).
Use the parameters on this dialog to specify the range of IP
addresses for the computers that are allowed to access the project
as Thin Clients.
Figure 2. IP Security dialog

When the Edit pane parameters become active, type IP addesses in the From and To fields to specify the IP address range. Use the Add and Remove buttons to move the IP addresses into the IP Address Range list. IWS permits the computers listed in this pane to access the project as Thin Clients
- To enable logging for the Thin Client, move to the Log pane and click (enable) the Enable checkbox and type a file name into the Filename field to generate a log file on the Thin Client station. You can use this log file for debugging purposes.
- Click OK to close the Project Settings dialog.
Also, because the Web pages display information from the project through the Web server, you must be running the runtime system, Web server, and the TCP/IP server to view your Web pages.