Use the following steps to create tags from the
Project Tags datasheet:
- Select the Global tab and open the Project Tags folder.
- Double-click the Datasheet View icon to open the Project Tags datasheet:
Figure 1. Project Tags datasheet
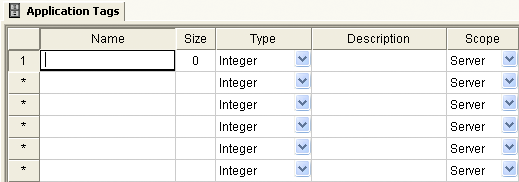
- Locate an empty line in the datasheet and configure
the following fields.
Tip: You can use the keyboard Tab key to move to the next column.
- Name field: Type a name using the proper syntax. (For more information, see "Tag Syntax".)
- Array Size field:
- For an array tag, type a value to specify the maximum index of the array.
- For any other tag type, type zero (0).
- Type combo-box: Click the arrow to select a tag data type (Boolean, Integer, Real, or String) from the list. (If necessary, review "Choosing a Tag Data Type.")
- Description field (optional): Type a description for documentation purposes only.
- Scope combo-box: Click the arrow to specify whether the tag value will be shared with (displayed on) Thin Client stations. (For more information, see "Choosing the Tag Scope".)
- Click in a new line to create another tag, or if you have no other tags to create, then save and close the Project Tags datasheet.
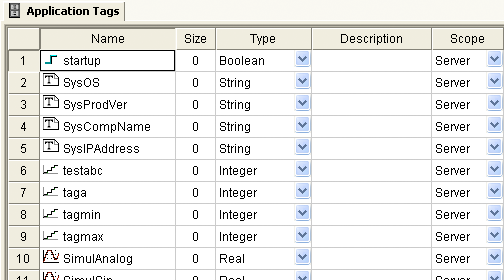
The following example shows a variety of tags
configured in an Project Tags
datasheet.
Figure 2. Example
Project Tags Datasheet