Fetch Project enables you to fetch any project that is available on the Change Management server and copy it to a selected destination directory.
|
Fetch project procedure. |
|
|
Fetch project notes. |
Fetch Project Procedure
Open a Workbench on the target computer.
Note: The Workbench can either be blank or can contain an existing project.
Click File>Fetch Project on the Workbench menu bar.
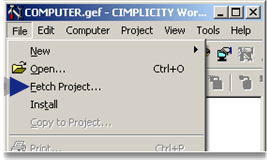
A Fetch Project Dialog box opens.
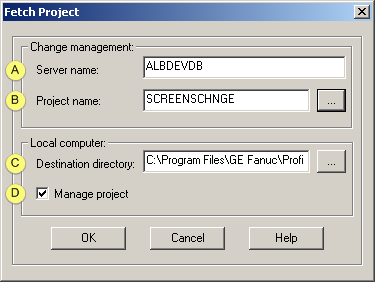
Enter or select the following.
|
Server name. |
|
|
Project name. |
|
|
Destination directory. |
|
|
Manage project. |
|
Server name |
Name of the Change Management server that has the project to be fetched.
|
Project name |
Name of the project to be fetched.
Find and add the project as follows, if you do not know the exact name.
Click the Browse button to the right of the Project name field.
A Change Management Logon dialog box opens.
Enter an authorized user name and password.
Click .
A Select Project Browser opens with a listing of projects on the Change Management Server; the listed project may include either the entire project or selected managed files. However, only entire projects can be fetched.
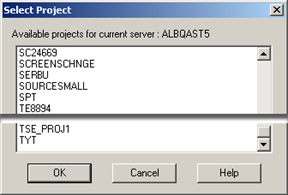
Select the project to be fetched.
Click .
Result: The Select Project browser closes and the selected project displays in the Project name field.
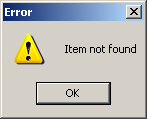
Note: If you selected a partial project a message box will open to report:
Item not be found.
|
Destination directory |
Directory the project directory will be fetched to.
|
Default |
...\GE Fanuc\Proficy CIMPLICITY\Projects Where ...\GE Fanuc\Proficy CIMPLICITY is the root directory. |
![]() Important
Important
![]() If the project already exists on
the target computer, the destination directory must be in a
different location from the local project.
If the project already exists on
the target computer, the destination directory must be in a
different location from the local project.
![]() UNC paths are not supported.
UNC paths are not supported.
e.g. \\computer\share
|
Manage project |
Do one of the following.
|
Check |
The project will be managed by Change Management. |
|
Clear |
The project will be copied to the destination directory; however,Enable Change Management will not be checked in the Project Properties dialog box. |
Click .
Result:
If you are not already logged onto the Change Management server, a Change Management Logon dialog box opens.
Enter an authorized user name and password.
Click .
The selected project is fetched to the selected destination directory.
Fetch Project Notes
![]() If the PCM project name is not the
same as the CIMPLICITY project name:
If the PCM project name is not the
same as the CIMPLICITY project name:
![]() The folder for the fetched
project has the Proficy Change Management project name.
The folder for the fetched
project has the Proficy Change Management project name.
![]() The project name is the local
project name.
The project name is the local
project name.
Example
![]() A local project is named
PCMLOCAL.
A local project is named
PCMLOCAL.
![]() The project is named PCMSERVER on
the Proficy Change Management server.
The project is named PCMSERVER on
the Proficy Change Management server.
![]() The project PCMSERVER is fetched
to another computer.
The project PCMSERVER is fetched
to another computer.
![]() The names are as follows.
The names are as follows.
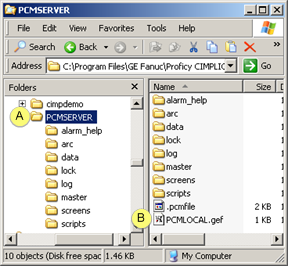
|
A |
The fetched project folder name is PCMSERVER. |
|
B |
The fetched project name is PCMLOCAL. |
![]() If you immediately open a Directory Comparison
report it will report that there are differences.
If you immediately open a Directory Comparison
report it will report that there are differences.
However, if you run the report to discover what the differences are, the report may declare there are no differences.
The initial notification that there are differences is based on time stamps of actual file creation vs. Fetch creation.
Note: If there actually were differences when the project was added or checked into the PCM server, those differences will be reported.
|
|
Proficy Change Management procedures. |