Change Management procedures can be initiated through Workbench menus and toolbar buttons.
![]() Important:
If you are using mapped drives to remotely configure a project
Change Management requires a share that is at least one folder
level above the actual project. folder.
Important:
If you are using mapped drives to remotely configure a project
Change Management requires a share that is at least one folder
level above the actual project. folder.
|
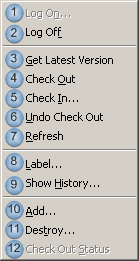
Change Management menus. |
|
|
Change Management toolbar buttons. |
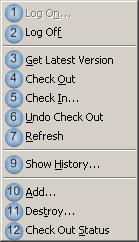
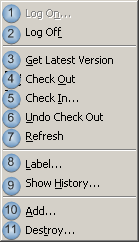
Change Management menus
Use one of the following.
|
Project/Computer Popup |
Managed File Popup |
Project/Computer Menu |
Workbench File Menu |
|
|
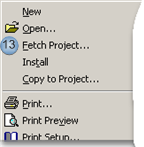
Click one of the following on the Workbench menu bar.
|
Click: Fetch project |
|
|
|
|
|
|
Log On |
|
|
Log Off |
|
|
Get Latest Version |
|
|
Check Out |
|
|
Check In |
|
|
Undo Check Out |
|
|
Refresh |
|
|
Label |
|
|
show History |
|
|
Add |
|
|
Destroy |
|
|
Check Out Status |
|
|
Fetch Project |
Change Management toolbar buttons
|
Workbench General Toolbar |
|
|
Manage Toolbar |
Workbench General Toolbar
Change Management buttons on the Workbench General toolbar are as follows.

|
|
Opens the Computer Properties dialog box. |
|
|
Opens the Project Properties dialog box. |
Manage Toolbar
The Workbench Manage toolbar provides buttons to quickly check out or check in Computer or Project managed files.
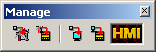
|
|
CIMPLICITY project checkout. |
|
|
CIMPLICITY project check in. |
|
|
Computer project checkout. |
|
|
Computer project check in. |
|
|
Animated button that turns to indicate when Change Management is working on a task. |
|
|
About Proficy Change Management. |