The available selections on the General tab depend on what point type you are configuring. The following procedure begins with entries for any point type and continues through entries for the analog/Boolean point types only.
There are several general choices you can make to add to your device point's configuration. They include:
For analog, Boolean or text points
|
Resource ID |
|
|
Enable point, enable alarm, Enterprise point. |
|
|
Safety point |
|
|
Availability trigger |
|
|
Invert |
|
|
Attribute set |
|
|
Extra info |
|
|
Level |
|
|
Log data |
For analog or Boolean points
|
Trend history |
|
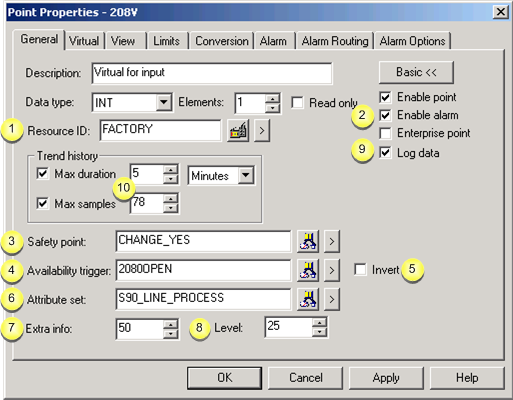
Resource ID |
Select an existing or create a new resource.
Users who have the selected Resource ID assigned to their Role ID will be able to see any alarms generated for this point on their Alarm Viewer screens.
|
|
Opens the Select a Resource browser to select an available resource. |
|
|
|
|
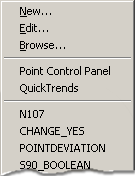
Displays a Popup menu to:
|
|
Enable point, enable alarm, Enterprise point |
Check any of the following.
|
Enable Point |
Enables the point at runtime |
|
Enable Alarm |
Enables the point's alarm |
|
Enable Enterprise |
Allows data to be exported to the Enterprise server so it will be available to other projects.
|
|
Safety point |
Status controls whether or not a setpoint is permitted.
The point can be:
Digital or analog (but not REAL)
Device or virtual
|
|
Opens the Select a Point browser to select an available point. |
|
|
|
Displays a Popup menu to: |
|
|
|
|
|
During runtime if the:
|
Safety Point is |
Setpoint on the Point is |
|
Available and evaluates to a non-zero value |
Permitted |
|
Available and evaluates to zero |
Not permitted |
|
Unavailable |
Not permitted |
|
Availability trigger |
Determines the validity of the point you are configuring and provides a "device healthy" signal for points that are tied to intermediate devices during runtime.
Can be digital or analog.
|
|
Opens the Select a Point browser to select an available point. |
|
|
Displays a Point Popup menu. |
|
Invert |
Check or leave blank based on the desired behavior, as described below.
|
At runtime if: |
Invert is Not Checked |
Invert is Checked |
|
Availability Trigger: |
Configured Point is: |
Configured Point is: |
|
Evaluates to a non-zero value |
Available |
Unavailable |
|
Evaluates to zero |
Unavailable |
Available |
|
Is Unavailable |
|
Unavailable |
|
Attribute set |
Sets of point attributes that use 16 bits and can be applied to one or more points in a project.
All of the attribute fields in the selected attribute set will be available to associate with the point in any expression that takes a Point ID.
|
|
Opens the Select Attribute Sets browser to select an available attribute set. |
|
|
|
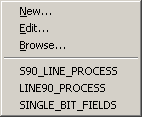
Displays a Popup menu to: |
|
|
|
|
|
|
Extra info |
Any 32 bit number you want to enter.
You can access it as a point attribute and do with it what you want.
|
Level |
A positive or negative number.
![]() Specifies a security level for the
point to restrict setpoint access; the higher the number, the more
restricted the setpoint access.
Specifies a security level for the
point to restrict setpoint access; the higher the number, the more
restricted the setpoint access.
![]() Level security affects all
writable attributes of the point, e.g. alarm limits, quality
attributes and raw value.
Level security affects all
writable attributes of the point, e.g. alarm limits, quality
attributes and raw value.
Result: When point level setpoint security is enabled a project user can set the point only if the user's assigned role has a corresponding level that is equal to or higher than the point level.
![]() Tip: Enable point level setpoint
security in the Point Setup dialog box.
Tip: Enable point level setpoint
security in the Point Setup dialog box.
|
Log data |
Displays when the option Database Logger: Points is checked in the Project Properties dialog box.
When checked, logs data to the default CIMPLICITY DATA_LOG.
Result: CIMPLICITY adds the point to its default DATA_LOG. You can apply more specifications in the Database Logger.
|
Trend history |
For analog and Boolean points only
|
Check box/Field |
Description |
|
|
|
(Checked box activates fields.) The amount of most recent time to be saved. Select one of the following: Seconds Minutes Hours Days |
|
|
(Checked box activates field.)
Point buffering lets you allocate a buffer for a point and save a number of the most recent values. This feature is currently being supported only for the Trending option. |
||
|
|
Example |
|
|
|
Point ABC is scanned every 5 seconds |
|
|
|
If you define a: |
|
|
|
Max Duration |
of 1 minute, the buffer contains the 12 most recent values for ABC at any given time. |
|
|
Max Count |
of 10, the buffer contains the 10 most recent values (that is, the values for the last 50 seconds). |
|
|
Max
Duration and |
The buffer contains the 10 most recent values. |
|
|
Step 2. Enter virtual point general properties. |