Click the
button ![]() to the right of the Transition
Point ID field.
to the right of the Transition
Point ID field.
![]()
Select New in the Popup menu.
A New Point dialog box opens.
Enter and select the following.
|
Point ID |
X_LOAD1 |
|
Type |
Virtual |
|
Class |
Text |
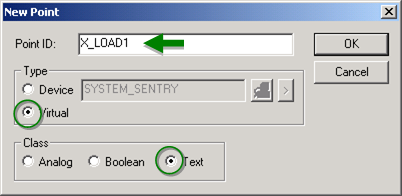
Click .
The Point Properties dialog box opens.
Enter and select the following on the Virtual tab.
|
Description |
Positive ID for Schedule to Load |
|
Data Type |
STRING_20 |
|
Elements |
1 |
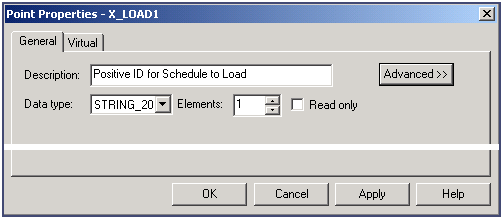
Select Automatic Item ID giving Item ID in the Translation Type Code field.
Click .
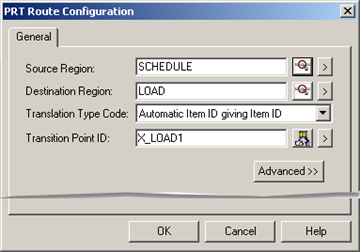
Result: You have configured the basic criteria for the SCHEDULE to LOAD route.
|
|