The frequent use of Bitmaps in WebAccess Graphics is not recommended if you have a slow network connection to the clients because of the large file sizes. This command can be used to add JPEGs to graphics. JPEGS are generally smaller than bitmaps.
It is recommend to use Vector Graphics and True type fonts in frames to reduce the graphic file size.
You cannot edit bitmaps in WebAccess DRAW. DRAW places the bitmap into a DRW file. You can change their screen size (but not file size), rotate them and some other animations. You will need PAINT or Adobe Illustrator or other bitmap editor to modify the bitmaps or optimize their file size.
The bitmaps and JPEGS are merged with the BGR. As long as you do not edit the graphic, you only need to have the BGR. If you plan to edit the Graphics, it is best to have the original Bitmaps and JPEGS in the /bitmap directory.
Warning - The bitmap or JPEG is not part of the DRW and must reside in the BMP folder on the Project Node. If you loose the bitmap and then edit the DRW, the bitmap or JPEG will disappear.
Hint - The bitmap or JPEG can not be reclaimed directly from the bgr. But if you do a screen print and use some bitmap editor like Paint you can reproduce it.
Hint - If you loose the original Bitmap or JPEG, it may be in the CBMP folder of the Client used to create the original DRW and BGR.
You must first Upload the bitmap to the project node. This can be done remotely from any client. If you have already done so, skip to step 3.
1. Start DRAW
2. Upload the Bitmap to the BMP folder. If you have already done so, skip to step 3.

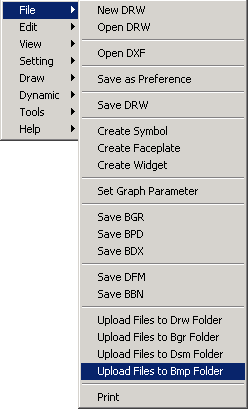
2a. Right Click -> File -> Upload Files to BMP Folder.
2b. Select Files of Type: BMP Files (*.BMP) or (*.JPEG)
2c. Browse to your BMP or JPEG.
2f. Select OPEN.
If you are on a client this will copy the Bitmap to the Project Node so other users can access it also. It will become part of the Project.
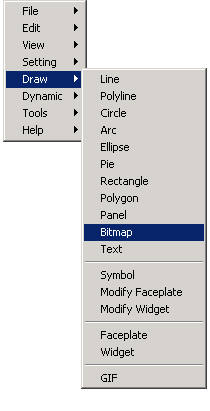
3a. Right Click -> Draw Bitmap.

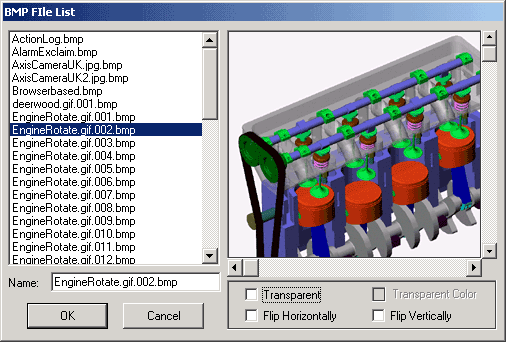
3b. The Draw Bitmap dialog box should open.

3c. Select the bitmap from the file list.
3d. Optionally, Select Transparent
3e. Optionally, Select a color that will be made transparent.
3f. Select OK
3g. Position the Bitmap on the screen.
3h. Left click the mouse to draw the bitmap
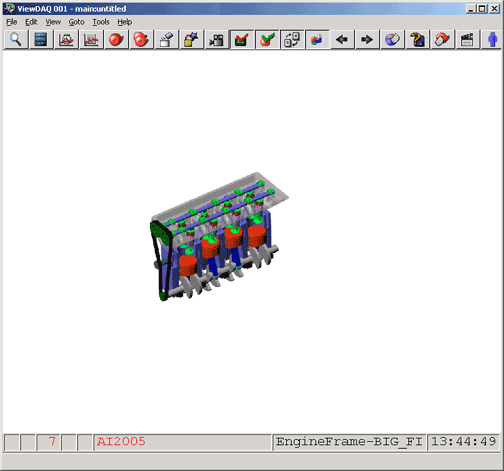
The BGR should look like the following.
