The Library is a
visual browser for all of the Symbols that are available
to be inserted in a project screen. To open the Library window, do one of the following:
- On the Graphics tab of the ribbon, in the Libraries group, click Symbols; or
- In the Graphics tab of the Project Explorer, double-click Symbols.
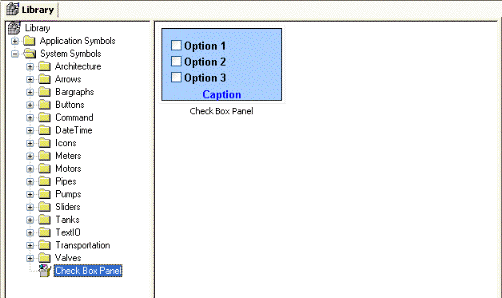
Figure 1. Symbols
Library window
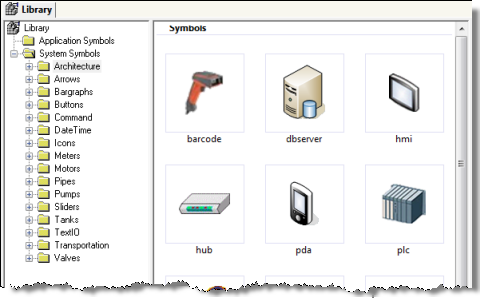
The Library is divided into two main directories: the Project Symbols directory contains the same user-made Symbols that are saved in the Symbols folder of the current project; and the System Symbols folder contains all of the premade Symbols that are installed with IWS, sorted by category (e.g., Buttons, Meters, Tanks).
To select a Symbol and place it in a project screen:
- Find the Symbol you want in the Library and then double-click it. The Library window will automatically close and the mouse cursor will change to indicate that you have a Symbol waiting to be placed.
- Return to the project screen where you want to place the Symbol.
- Click anywhere in the project screen to place the selected Symbol.
- Edit the Symbol's Object Properties as needed, including any Custom Properties.
For more information, please see Inserting a Symbol in a Screen.
Making a User-Made Symbol Available to Other Projects
User-made Symbols are normally available only in the
project where they were initially created and saved — that is, the
Project Symbols directory of
the Library is specific to each project. However, you can send a
user-made Symbol to the System
Symbols directory, to make it available to all projects:
- Right-click on the Symbol file ( .sym ) in the Symbols folder and choose Send to System Symbols from the shortcut
menu. A standard Save As
dialog is displayed, pointing to the \Symbol directory of IWS (instead of the
\Symbols directory of the current
project).
Figure 2. Saving a Symbol
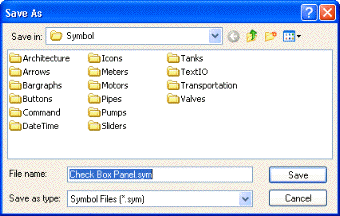
- Choose a location to save the Symbol file. You can choose one of the existing categories/directories, or you can create a new one.
- Click Save. The
Symbol file is saved chosen location and the Symbol is displayed in
System Symbols directory of
the Library.
Figure 3. Saving a Symbol