Standard viewing software |
|
Manual -> Remote Desktop -> Establishing a connection -> Standard viewing software |
Standard viewing software |
|
Manual -> Remote Desktop -> Establishing a connection -> Standard viewing software |
After establishing a connection, the viewing software will show the screen of the remote desktop.
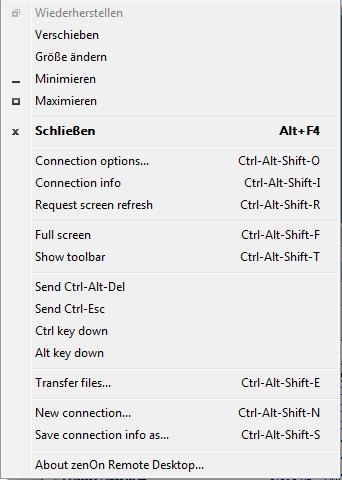
Further settings can be made via the toolbar or the context menu. Even if the toolbar is not visible, you can use the context menu by right-clicking on the title bar of the viewing software or on the symbol in the taskbar. If you are in full screen mode, you have to deactivate it first by using the keyboard shortcut <Ctrl><Alt><Shift><F>.


The toolbar and the context menu offer the following options:
|
|
Opens the dialog for editing the connection options. See chapter Connection options |
|
|
Opens a dialog that shows information about the current connection. |
|
|
Switches to full screen mode. This means
that you will no longer have a Windows frame around the
software. You can use the keyboard shortcut <Alt><Tab> to switch between the remote computer and the local computer. You can end the full screen mode with the keyboard shortcut <Ctrl><Alt><Shift><F>. |
|
|
If the display appears blurred, you can force a refresh of the remote desktop. |
|
|
This action has no effect. |
|
|
Opens the start menu of the remote desktop. |
|
|
Presses the Ctrl key of the remote desktop. Click again to release the key. |
|
|
Presses the Alt key of the remote desktop. Click again to release the key. |
|
|
Opens the File Transfer dialog (See File transfer) that allows you to transfer files from and to the remote desktop. This option is only available if file transfer was activated on the Remote Desktop. See Configuration. |
|
|
Opens the dialog for a new Remote Desktop connection. See Establishing a connection. The existing connection will be closed. |
|
|
Saves a link to this connection as an RDC
file (Remote Desktop Communication file) You can put this link on
your desktop, for example. When saving, you will be asked if you
want to store the password in the file. By double-clicking on the link, you will start the connection software and establish a connection to the configured remote desktop without having to enter a computer name (and password, if you have chosen to store it in the file). |
|
|
Closes the connection and quits the program. |