Select Toolbars to open a cascade menu (see figure) from which you can manage the interface toolbars and windows.
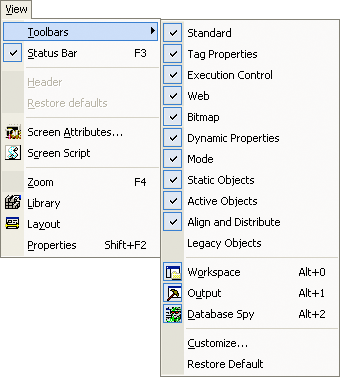
Toggle the individual toolbars on (checked) or off (unchecked) to specify whether the toolbars are visible or hidden in the Development Environment.
Click one or more of the following icons (or use the Alt key combinations noted) to specify whether the Project Explorer, Output, and/or Database Spy windows are visible or hidden.

Click Customize to open the Customize dialog. You can use the tabs on this dialog to customize your development environment, as follows…
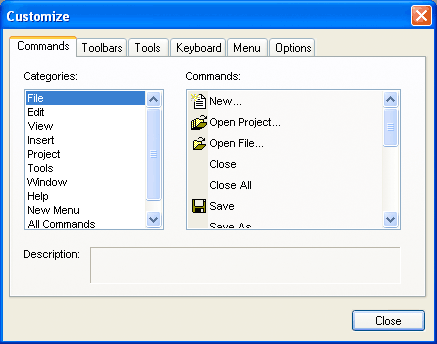
Commands tab
Commands tab: Use to customize menu options on the menu bar or on any of the toolbars. You can select any command from the Commands list and drag it to any menu bar or to any toolbar in the development environment.
Toolbars tab
Toolbars tab: Use to customize toolbars for your development environment. Use the features and options on the Toolbars tab as follows:
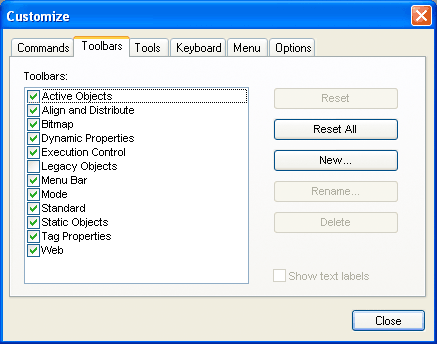
- Toolbars list:
Click on items in the list to specify whether the toolbars are
visible (checked) or hidden (unchecked).
- Reset button: Click to restore default settings for the selected toolbar(s).
- Reset All button: Click to restore default settings for all toolbar(s).
- New button: Click to create new toolbars.
- After creating a new toolbar, you can drag icons
from the Commands tab to the
newly created toolbar.
- Rename button: Click to rename any toolbars you created.
- Delete button: Click to exclude any toolbars you created.
- Show text labels checkbox: Click to display the tool labels for a selected toolbar.
Tools tab
Tools tab: Use to create shortcuts to external programs so those programs will be available from the Tools menu.
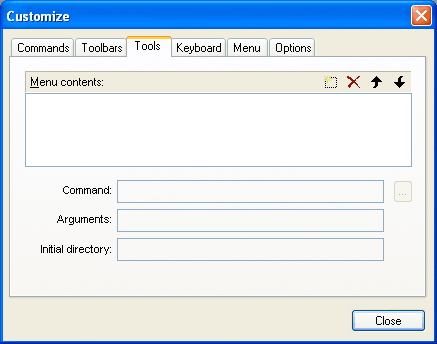
Use the following icons (located above the Menu contents pane) to create a shortcut.
- New (Insert):
Click this icon
 to configure the Command, Arguments, and Initial directory options for the
shortcut.
 - Delete: Click this
icon
 to exclude the selected shortcut.
 - Move Item: Click
one of these icons
 to shift the shortcut's
position up or down within the Tools menu.
Keyboard tab
Keyboard tab: Use to configure shortcut keys for different menu commands.
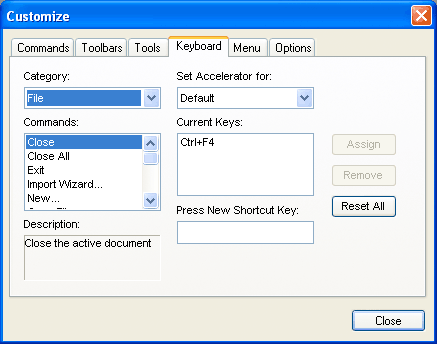
Use the following features to create a shortcut key:
- Category and Commands combo boxes: Click the combo-box button and specify the menu and command for which you want to define a shortcut key.
- Set Accelerator for combo box: Select an item from the list to specify the video accelerator option, if applicable.
- Current Keys field: Verify the shortcut assigned to a selected command.
- Press New Shortcut Key text box: Type a shortcut into the box and click the Assign button to configure a new shortcut key for a selected command.
- Remove button: Click to exclude a shortcut key from a selected command.
- Reset All button: Click to restore the default settings.
Menu tab
Menu tab: Use the features on this tab to customize context menus.
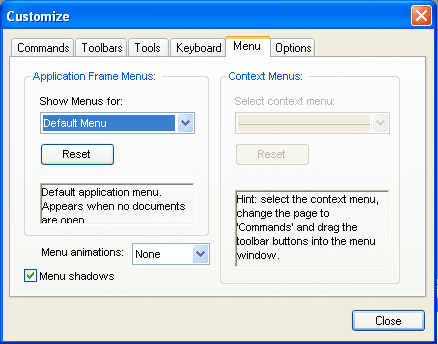
Use the following features to customize a context menu.
- Show Menus for combo box: Click the combo-box button to specify which menu
- Reset button(s): Click to reset the default menu features.
- Menu animations combo box: Click the combo-box button to specify effects for the context menu (None, Unfold, Slide, or Fade).
- Menu shadows checkbox: Click to enable the shadow in the context menus.
- Context menus combo box: Click the combo-box button to specify
Options tab
Options tab: Use to customize the general appearance of the toolbars and menus in your development environment.
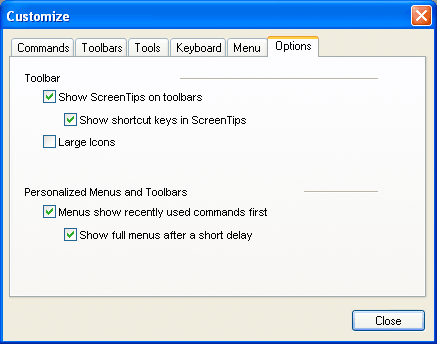
- Toolbar pane: Click the checkboxes to enable (checked) or disable (unchecked) the features.
- Personalized Menus and Toolbar pane: Click the checkboxes to enable (checked) or disable (unchecked) the features.