WebAccess uses an ODBC connection to SQL Server. ODBC is an acronym for Open Database Connection. DSN is an acronym for Data Source Name.
The Microsoft SQL Server ODBC Device Drivers must be installed on the Project Node.
There are two SQL ODBC drivers that appear to work with SQL Server 2005:
1) the SQL Native Client Driver installed as part of the SQL Server 2005 client services. Use this driver is the Project Node and the SQL Server 2005 are the same PC or if you installed the SQL Server 2005 client services on the WebAccess Project Node.
2) The SQL Server Driver part of Windows XP Professional and Windows 2000 dated 10/28/2003 and later (version 3.70.11.46 of SQLSRV32.DLL). Use this if the SQL Server is on a remote node.
It is easier to use a System DSN. The System DSN allows access to the SQL ODBC drivers no matter who is logged on to the Project Node. The System DSN also makes for less confusion later on.
A User DSN will work as well. The User DSN is specific to each user and allows you to restrict which users have access. However, you must configure a User DSN for each user that might be logged on the Project Node.
Any name can be given to the DSN. But make it one that you can remember This DSN name must be entered into the WebAccess Project Manger as the ODBC Log Data Source.
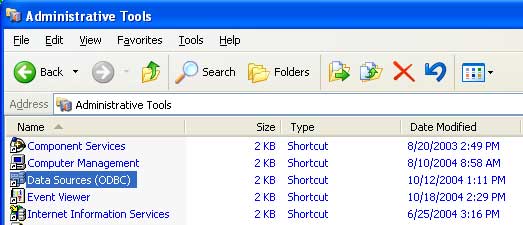
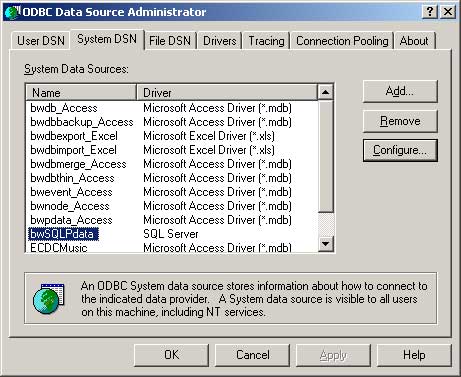
1. From Control Panel open ODBC Data Source Administrator, on the Project Node.
Start -> Control Panel -> Administrative Tools -> Data Sources (ODBC).
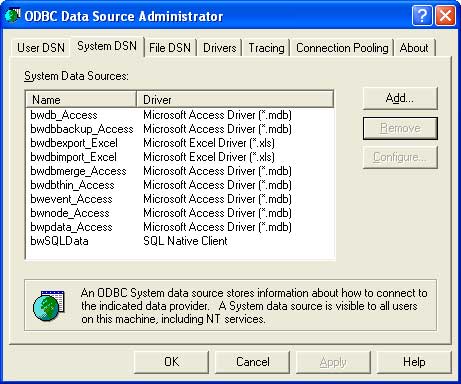
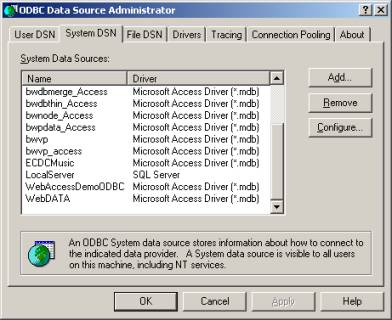
2. Select System DSN.
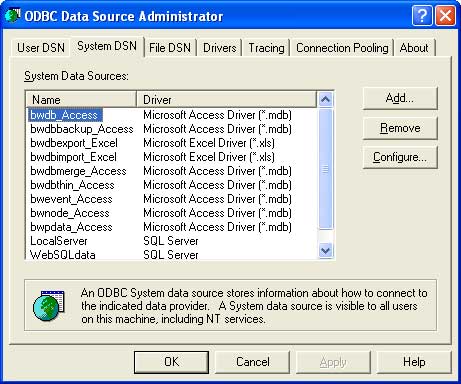
3. Click on the ADD button. This will open the Create New Data Source dialog box, shown below.
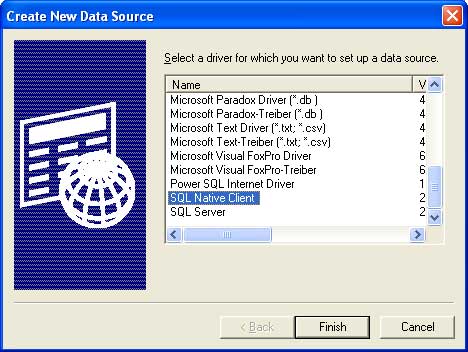
4. Look for the driver titled SQL Native Client. If this driver is not listed in the window and the SQL Server is, go to Section 2. Configure SQL Server DSN.
5. Double-click on the driver SQL Native Client. The Create a New Data Source to SQL Server Setup dialog box will open, as shown below.
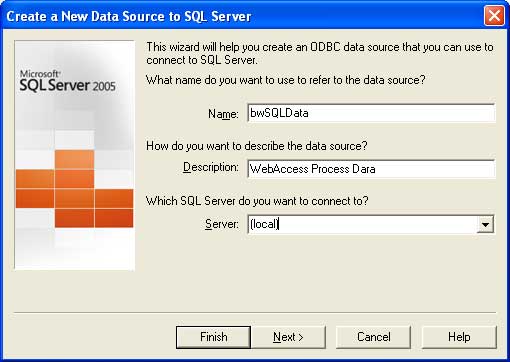
6.
In the Name text
box, enter a name for this DSN. You will have to enter this
name in WebAccess Project Node.
For example, bwSQLData
7.
In the Server
combo-box, you must enter the name of the computer running SQL
server.
If SQL Server is installed on the Project Node, Select
(local).
Otherwise, select the computer with the SQL Server. (Note - if you do not see the other computer listed, you should try to Register SQL server as described earlier).
8. Click on the Next > button.
9. Select "SQL Server authentication".
Enter the sa as the user login ID and the password you created in step 14 of Section 23.3.1 Install SQL Server 2005.
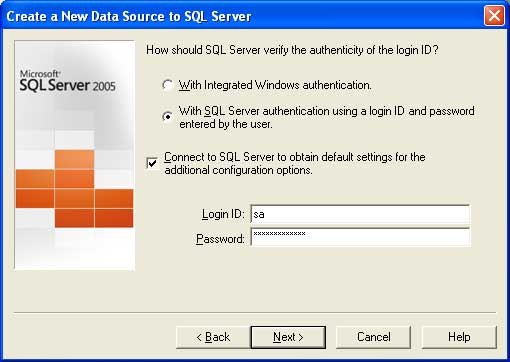
Figure 23.3 Use SQL Server Authentication and SQL Server login ID and Password.
Select Next after you have entered the password for the sa account. (or whatever account you know will work).
10. Check the Change the default database to.
Use the Pull Down box or type the Database name you created in SQL Server Management Studio. This name has to match exactly. Go back to Section 23.3.2 Create and SQL Server Database if you skipped this step or forgot the Database name. In the example it was WebAccessPData.
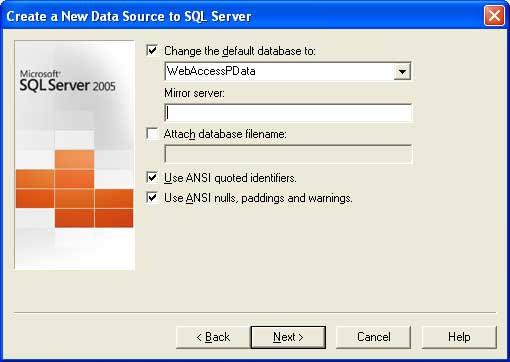
Select Next.
11.
Check "Use regional
settings.....".
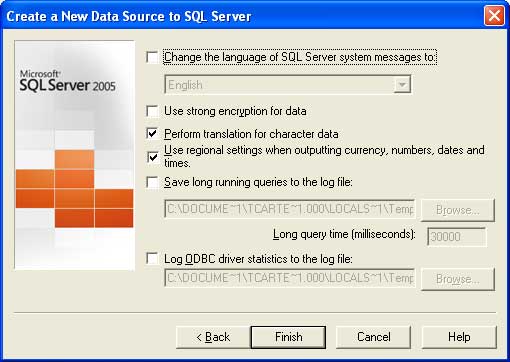
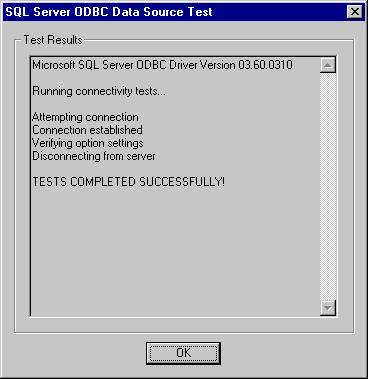
12. Select Test Data Source.
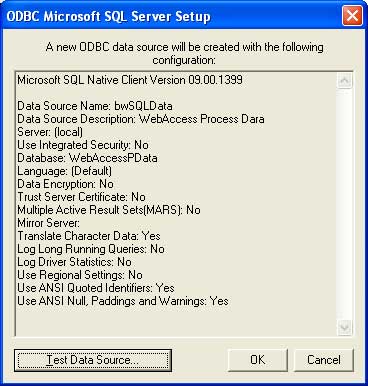
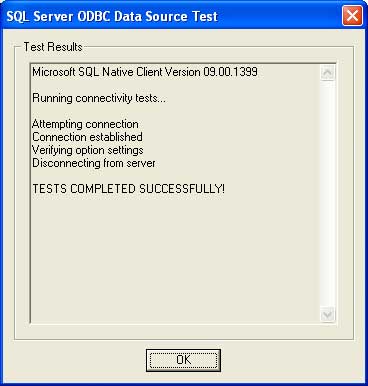
13. You should see "TESTS COMPLETED SUCCESSFULLY!". Select OK.
If it did not Test Successfully. Try these steps:
If the SQL Server is a remote node, verify that TCP port 1433 is open on the SQL Server Node (i.e. check any firewalls or Windows Firewall).
Verify the SA Login Password or whatever Login ID you used to configure this DSN.
Verify the Database name.
Verify that SQL Server is running.
14. Select OK three times (one for each dialog box) to exit ODBC configuration.
15. You should remember the DSN name, because this is what you will tell WebAccess to use. In this example the ODBC DSN is bwSQLData. It could have been any name that you used, just remember it.
16. Next and last step is to tell WebAccess to use the DSN. See Section 20.8.1 Create an ODBC Log Data Source. and 20.8.2 Select new ODBC Log Data Source. And be sure to Select the ODBC Data source (section 20.8.2).
Use this section if you do not have the SQL Native Client as in the above example 1. on your project node. You can instead use the SQL Server ODBC Driver of Windows XP Professional and Windows 2000 (version 3.70.11.46 of SQLSRV32.DLL dated 10/28/2003 and later). It is common to use this ODBC driver if the SQL Server is on a remote node.
It is recommended to use the TCP Network Library connection instead of Named Pipes.
1. From Control Panel open ODBC Data Source Administrator, on the Project Node.
Start -> Control Panel -> Administrative Tools -> Data Sources (ODBC).
2. Select System DSN.
3. Click on the ADD button. This will open the Create New Data Source dialog box, shown below.
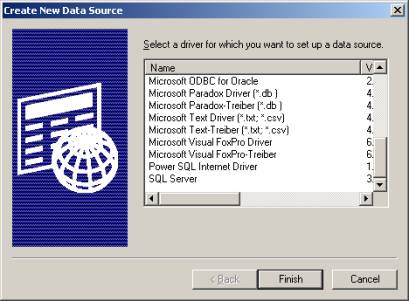
4. Look for the driver titled SQL Server. If this driver is not listed in the window, then the ODBC SQL Server driver has not been installed properly.
5. Double-click on the driver SQL Server. The ODBC SQL Server Setup dialog box will open, as shown below.
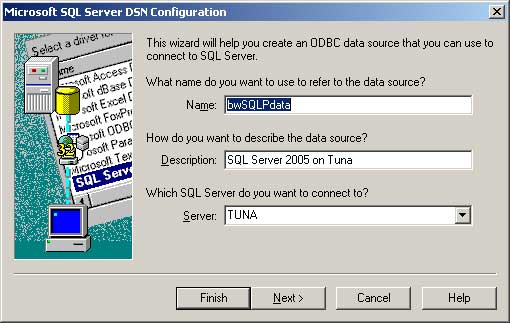
6. In the Name text box, enter a name. For example, bwSQLPdata.
7.
In the Server
combo-box, use the pull down list or type the name of the computer
running SQL server.
If SQL Server is installed on the Project Node, Select
Local. Otherwise, select the computer with the SQL
Server. (TUNA in the example).
Click on the Next > button.
8. Select "SQL Server authentication" if you followed the examples earlier.
It is also possible to use Windows Authentication if both the Project Node and the SQL Server are in the same domain and you know the login information for a user with access to the SQL Server node.
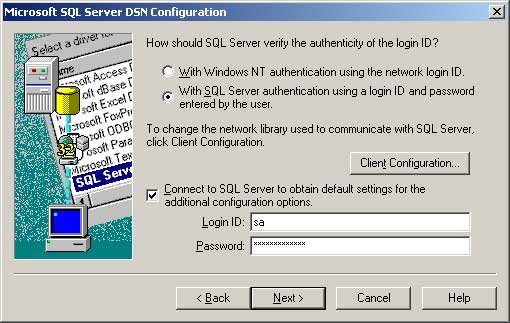
Figure 23.3 Use SQL Server Authentication and SQL Server login ID and Password.
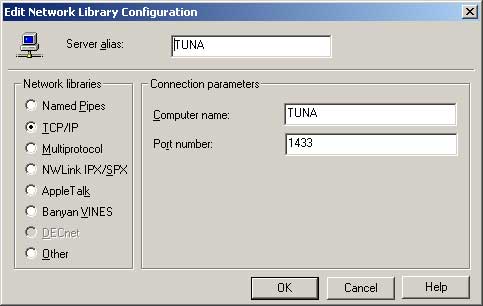
9. Select Client Configuration and select TCP/IP for Network Libraries.
Also verify the Port Number is correct. 1433 is the default port for SQL Server (but your network Administrator may have changed it).
Select OK.
10. Select Next.
11.
Check the Change the default
database to.
In the Change the default database to box, use the pull down list
to select the SQL database name that you created using
SQL SERVER 2005 MANAGEMENT STUDIO.
The name in the above examples is WebAccessData.
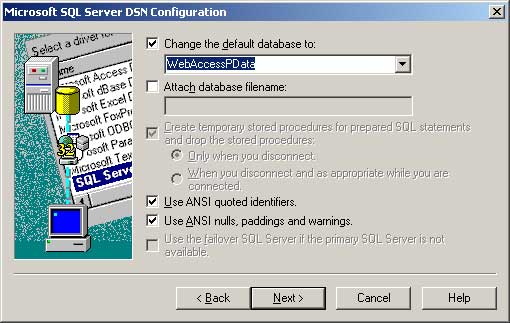
12. Check Use ANSI quoted identifiers.
13. Check Use ANSI nulls, paddings and warnings.
14. Select NEXT.
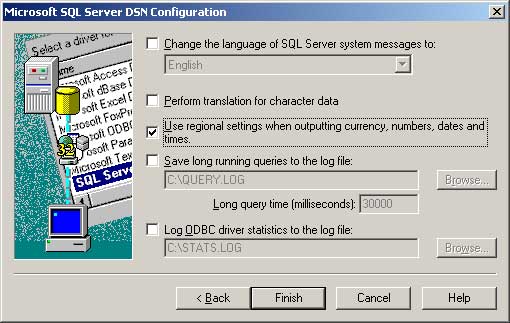
15. Select Use regional settings......
16. Select Finish.
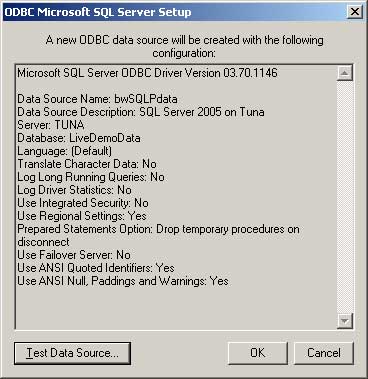
17. We recommend using the Test Data Source.
18. A successful test should look like the following
19. Select OK three times (one for each dialog box) to exit ODBC configuration.
If it did not Test Successfully. Try these steps:
If the SQL Server is a remote node, verify that TCP port 1433 is open on the SQL Server Node (i.e. check any firewalls or Windows Firewall).
Verify the SA Login Password or whatever Login ID you used to configure this DSN.
Verify the Database name.
Verify that SQL Server is running.
20. Remember the DSN name, because this is what you will tell WebAccess to use. In this example the ODBC DSN is bwSQLPData. It could have been any name that you used, just remember it.
21. Next and last steps are to tell WebAccess to use the DSN. See Section 20.8.1 Create an ODBC Log Data Source and 20.8.2 Select new ODBC Log Data Source. And be sure to Select the ODBC Data source (section 20.8.2).