Combo Box Properties | Configuring a Combo or List Box
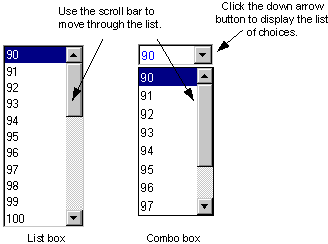
The combo box and list box objects provide a list of options for the user to select from during run-time. The major difference between the two controls is that the drop-down lists act as their name suggests; they drop down to show all the options and allow you only one selection. A list box, however, shows a list of options and allows multiple selections. Both lists are scrollable.

You can use the data in list and combo boxes to update other objects, such as a grid or a chart. For more information on linking data and combo boxes to other objects, refer to Parameters and Properties.
List/Combo boxes can be populated in two ways:
Data Bound – items come directly from a data source. For example, an SQL statement can be used to provide a list of items.
Manual Entry – items can be typed in, and/or you can use string values from a data source. You would use string values from a data source if you want to use a list box to drag and drop data items onto a chart or grid. For example, you may select strings from a Historian data source to populate a list box. When the display is run, the tag strings appear in the list box (that is, not the tag values). If the list box is then linked to a grid, when an item is dragged and dropped onto a grid, the values associated with the string are loaded into the grid.
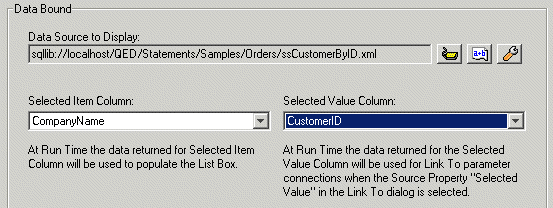
When you configure a list/combo box, and select the Data Bound option, you must specify the Selected Item Column. This is what will actually appear in the list/combo box for the user to select. It is optional to also provide the Selected Value Column. The Selected Value Column is what will be passed from one object to another when objects are linked with Source Property set to "Selected Value". If Source Property is "Selected Item" then the item will be passed to the linked object. The following example shows how items/values may be used:

In this example, the list/combo box will consist of a list of company names. If the list/combo box is linked to a grid using Source Property "Selected Value", then when the user selects the company name, the Customer ID that is associated with the selected company name will be passed to the grid (so that the grid will display the information for that Customer ID).
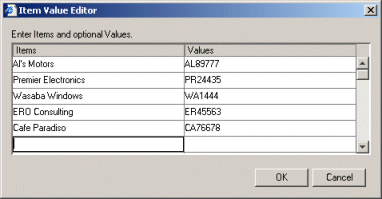
When you select Manual Entry for the list/combo box, you can manually enter a value for each item in the Item Value Editor. The following shows how the previous example might appear if manually entered.

The Items in this example are the Company Names; the Values are the Customer IDs.
If values are not entered in the Item Value Editor, the value is automatically set the same as the item.
NOTE: When you are using the list or combo box to pass a time parameter to another object, you must use the "Selected Value" rather than the "Selected Item" source property. For example, if you configure a list box with a data source that is an SQL date or a Historian timestamp, you must use the "Selected Value" source property on the Parameter Connections dialog box. For more information on linking object parameters, see Parameter Connections.
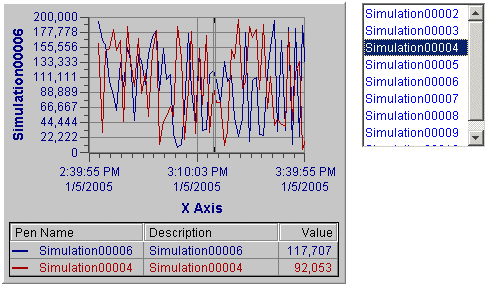
You can use a list box to drag data items into charts and grids. For example, in the figure below, a data tag from the list box on the right has been dragged onto the Time chart to add it as an additional pen in the chart. This is a quick way of pulling data into a chart or grid. To configure a list box for the drag-and-drop feature, in the Configuration dialog box, select the Manual Entry option button and use the Data Source Browser to select the data items. For more information, see Configuring a Combo or List Box.
